| | LrdSatyr's DeAgostini Millenium Falcon Diorama Build |    |
|
|
| Author | Message |
|---|
ArtooDetour
Admin


Posts : 9074
Join date : 2010-03-13
 |  Subject: Re: LrdSatyr's DeAgostini Millenium Falcon Diorama Build Subject: Re: LrdSatyr's DeAgostini Millenium Falcon Diorama Build  Wed Aug 24, 2016 12:46 pm Wed Aug 24, 2016 12:46 pm | |
| Superb work, nice to see this coming along! You did a good job of the seating area, and the pipe and wire work on the 'kissing booth' looks great lit up. |
|
 | |
LrdSatyr8
Imperial Admiral


Posts : 631
Join date : 2013-01-01
Age : 57
Location : South Carolina
| | Subject: Re: LrdSatyr's DeAgostini Millenium Falcon Diorama Build Wed Aug 24, 2016 1:31 pm | |
| - Artoo_Detour wrote:
- Superb work, nice to see this coming along! You did a good job of the seating area, and the pipe and wire work on the 'kissing booth' looks great lit up.
Thanks bro... I really like how everything is starting to come together. Slowly albeit, but it's really coming together!  |
|
| | |
LrdSatyr8
Imperial Admiral
Posts : 631
Join date : 2013-01-01
Age : 57
Location : South Carolina
| | Subject: Re: LrdSatyr's DeAgostini Millenium Falcon Diorama Build Mon Aug 29, 2016 1:41 pm | |
| |
|
| | |
LrdSatyr8
Imperial Admiral
Posts : 631
Join date : 2013-01-01
Age : 57
Location : South Carolina
| | Subject: Re: LrdSatyr's DeAgostini Millenium Falcon Diorama Build Mon Aug 29, 2016 1:47 pm | |
| |
|
| | |
trappedtexan
Moderator


Posts : 4772
Join date : 2012-12-01
Location : USA, Texas
| | Subject: Re: LrdSatyr's DeAgostini Millenium Falcon Diorama Build Mon Aug 29, 2016 11:39 pm | |
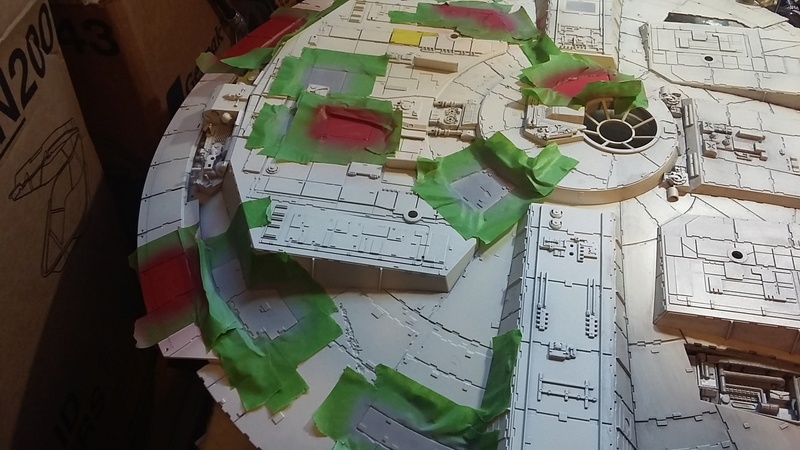
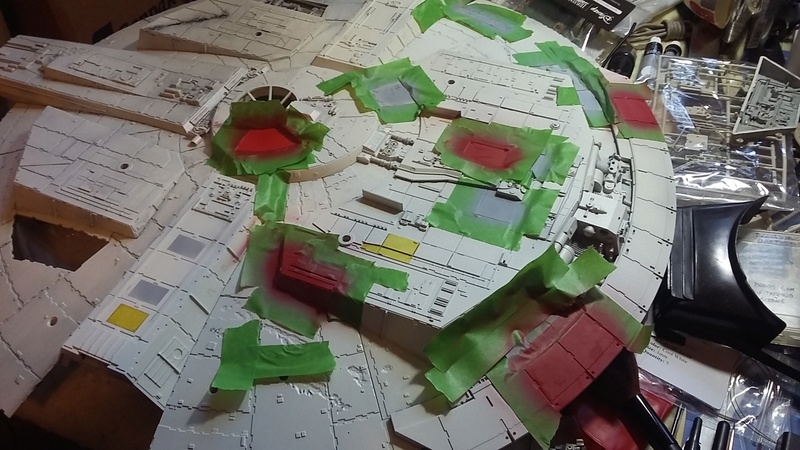
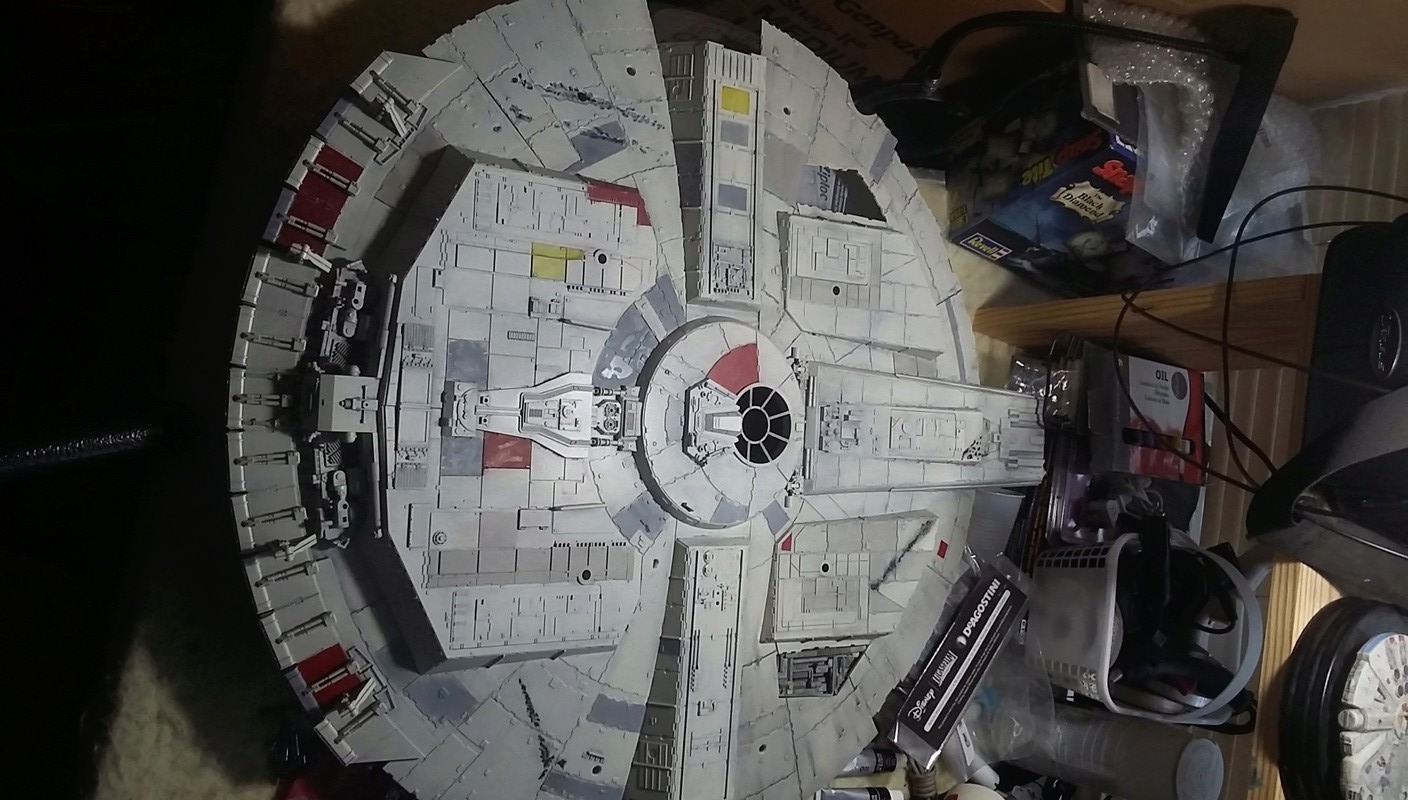
| Looks great. I notice in the pic where you can see both yellow painted panels that one looks a lot brighter than the other. Is it just the lighting? The brighter one sticks out to me in that pic, like it doesn't "fit" in with the rest. |
|
| | |
LrdSatyr8
Imperial Admiral
Posts : 631
Join date : 2013-01-01
Age : 57
Location : South Carolina
| | Subject: Re: LrdSatyr's DeAgostini Millenium Falcon Diorama Build Tue Aug 30, 2016 6:50 am | |
| - trappedtexan wrote:
- Looks great. I notice in the pic where you can see both yellow painted panels that one looks a lot brighter than the other. Is it just the lighting? The brighter one sticks out to me in that pic, like it doesn't "fit" in with the rest.
Its just the lighting... both are the same color. still gotta do some weathering thou. |
|
| | |
LrdSatyr8
Imperial Admiral
Posts : 631
Join date : 2013-01-01
Age : 57
Location : South Carolina
| | Subject: Re: LrdSatyr's DeAgostini Millenium Falcon Diorama Build Tue Aug 30, 2016 9:32 am | |
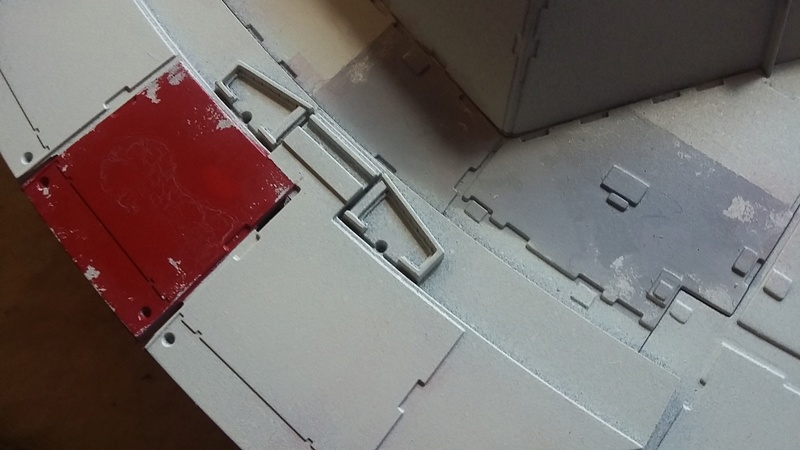
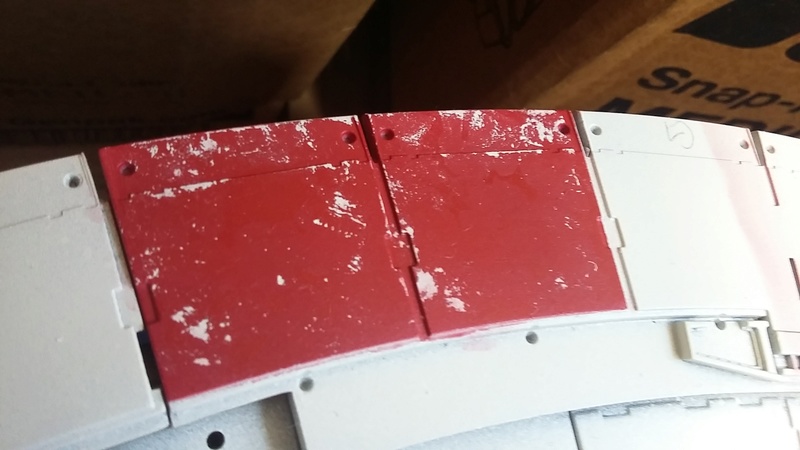
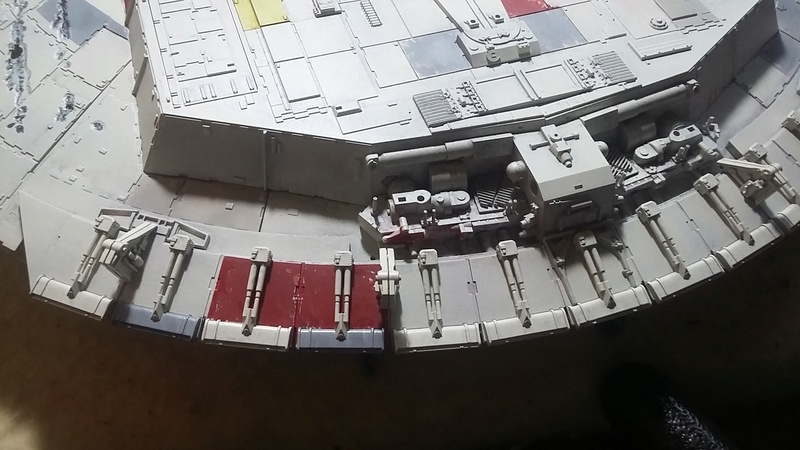
| Just like many of you, I have been watching other's build this same model kit with awe and amazement. I've watched how some people tackle a particular problem with detail or inaccuracy and think to myself why didn't I think of that. I've seen some fantastical elaborate ways of solving problems that come out looking extremely incredible... but I think to myself why go thru all that trouble. Well, here's my solution to a problem with the blaster holes on the top hull behind the radar dish. I don't know why, but it seems as if the scan of those "bullet holes" came out as indentions. Almost as if they are some kind of computer artifact that the computer couldn't quite interpret and just said fudge it and made them all even. Now, I've seen some builders actually cut these holes out completely, use a soldering iron to melt the plastic, burn the plastic... heck... I've even seen some people replace the entire panel itself with their own scratch built part. The problem they all run into is the metal framework behind them. You could cut the framework or try to work around it. Me... my solution doesn't damage the plastic panel or the framework at all. All it takes is a little Epoxy Putty (also known as Apoxie Sculpt, Aves, Magic Sculpt, or any 2 part Epoxy Clay Compound that you mix equal parts together and it hardens by itself)! Here's the panel I'm talking about...  Now notice how nice and symmetrical these blaster holes are? Even thou all the "holes" are in the proper place and position... they don't look anything like they should on the actual prop here ( image of the actual prop on display at Star Wars Identities in France photographed by Jean-Marc Deschamps & Olivier Cabourdin)...  So here's my method... take a small ball of putty and place it into the hole.  Squish it down until it fills the entire hole...  then wet your finger and make a depression or dimple in the putty. Smooth it out so that all the edges are even with the top edges of the hole and then take a hobby knife or whatever else that you use for fine detail work and stab it in the middle of the putty. Slowly and gently move it back and forth to create a hole in the middle wiping away the putty from the black inside the hole. 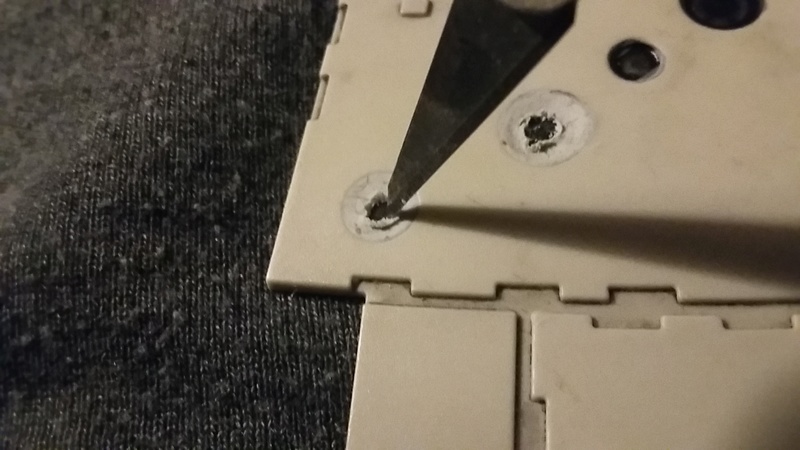 You can work it back and forth to create a realistic hole but not too big. Remember the hole is only in the center of the depression. Use the pushed aside putty gathered around the hole you made to create the torn flaps. Notice that there are 2 completely filled holes here just like on the original prop. Repeat the same process for each hole and set it aside for the putty to cure and harden. Paint to taste! 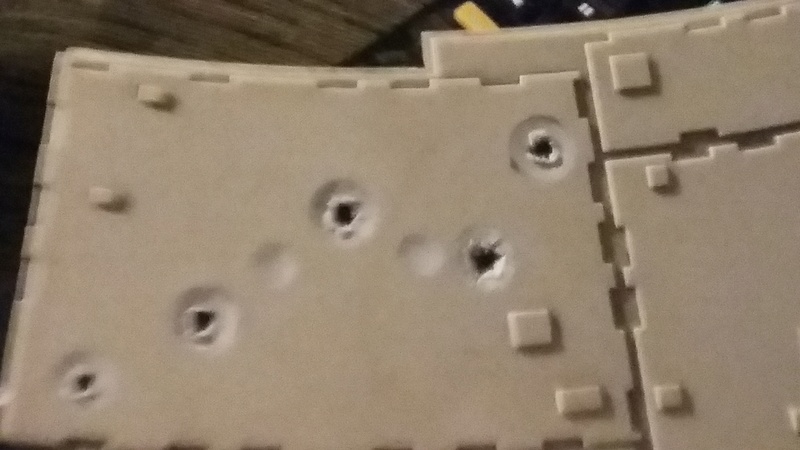 Viola... you've just created realistic blaster holes without cutting, marring, maiming, melting, defiling or otherwise destroying the plastic whatsoever (however you can berate the plastic and call it names to your hearts content because it doesn't know any better, just make sure to kiss and make up afterward!) and you never have to worry about the framing behind it! When it's dry and all painted up you'll see a world of difference! Hope this little tip helps! Lemme know what you think! |
|
| | |
ArtooDetour
Admin
Posts : 9074
Join date : 2010-03-13
| | Subject: Re: LrdSatyr's DeAgostini Millenium Falcon Diorama Build Tue Aug 30, 2016 2:38 pm | |
| Nice method for the blaster holes, I like the jagged/violent look to them. Kudos too for the panel painting and weathering. Really great job! |
|
| | |
LrdSatyr8
Imperial Admiral
Posts : 631
Join date : 2013-01-01
Age : 57
Location : South Carolina
| | Subject: Re: LrdSatyr's DeAgostini Millenium Falcon Diorama Build Wed Aug 31, 2016 10:23 am | |
| - Artoo_Detour wrote:
- Nice method for the blaster holes, I like the jagged/violent look to them. Kudos too for the panel painting and weathering. Really great job!
Thanks bro! Really starting to come together! |
|
| | |
darthmatt22
Developer


Posts : 1769
Join date : 2015-09-29
Age : 34
Location : New Jersey, USA
| | Subject: Re: LrdSatyr's DeAgostini Millenium Falcon Diorama Build Tue Sep 06, 2016 8:52 am | |
| Just caught up with all the new updates! I have to say.. the way you've been "battle scarring" the Falcon up is pretty legit, man. As always, keep up the great work. I'm sure you're ecstatic to see your idea come to fruition!  |
|
| | |
LrdSatyr8
Imperial Admiral
Posts : 631
Join date : 2013-01-01
Age : 57
Location : South Carolina
| | Subject: Re: LrdSatyr's DeAgostini Millenium Falcon Diorama Build Tue Sep 06, 2016 3:55 pm | |
| |
|
| | |
trappedtexan
Moderator
Posts : 4772
Join date : 2012-12-01
Location : USA, Texas
| | Subject: Re: LrdSatyr's DeAgostini Millenium Falcon Diorama Build Tue Sep 06, 2016 4:12 pm | |
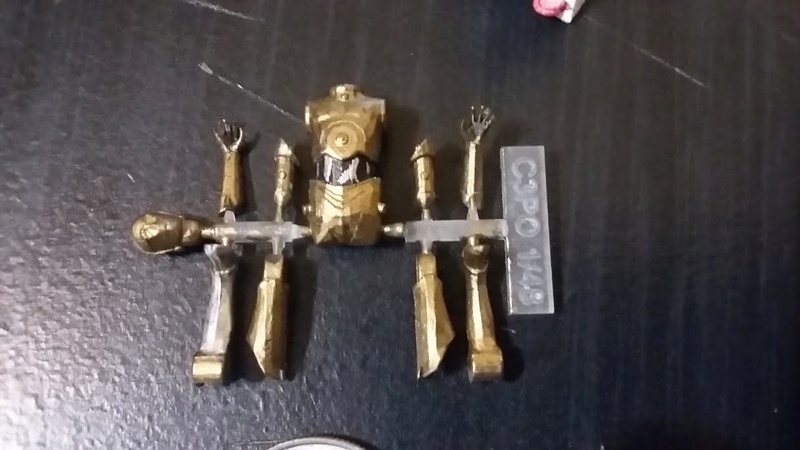
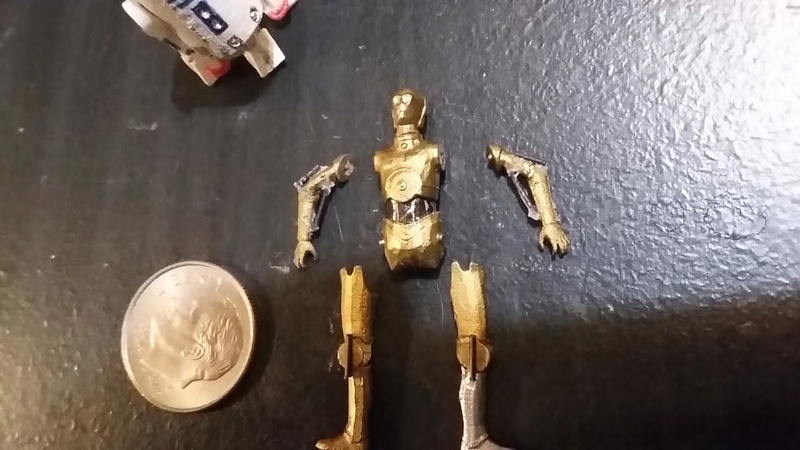
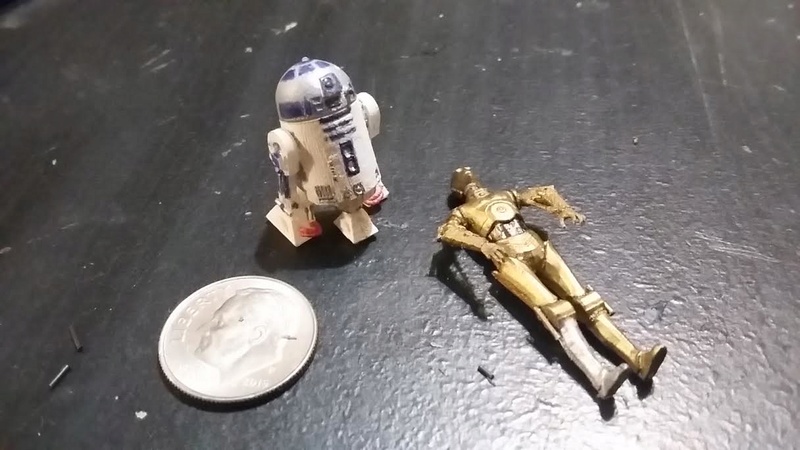
| I think......I want a set. Dang those are awesome. How come they can't print the piston, but the fingers they could. Looks close to the same thickness to me.
I still need to take some photos of the model you made for me, but a pair of these would look cool next to it, or in the jabbas palace if I ever get around to doing it. |
|
| | |
LrdSatyr8
Imperial Admiral
Posts : 631
Join date : 2013-01-01
Age : 57
Location : South Carolina
| | Subject: Re: LrdSatyr's DeAgostini Millenium Falcon Diorama Build Tue Sep 06, 2016 4:57 pm | |
| - trappedtexan wrote:
- I think......I want a set. Dang those are awesome. How come they can't print the piston, but the fingers they could. Looks close to the same thickness to me.
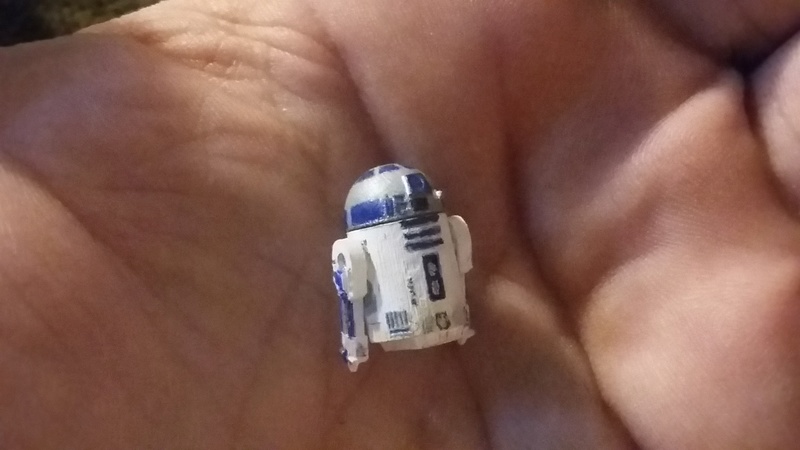
I still need to take some photos of the model you made for me, but a pair of these would look cool next to it, or in the jabbas palace if I ever get around to doing it. Well I think it also has something to do with the length and the support. The fingers are small, but aren't very long. The pistons on the other hand are long and even thou are the same thickness, wouldn't print well. I might light them up with fibers but not sure yet. I probably won't use R2 in my diorama at all thou and I'm almost scared to try and drill a couple of hole into this resin runs the risk of it shattering. |
|
| | |
LrdSatyr8
Imperial Admiral
Posts : 631
Join date : 2013-01-01
Age : 57
Location : South Carolina
| | Subject: Re: LrdSatyr's DeAgostini Millenium Falcon Diorama Build Mon Sep 12, 2016 1:50 pm | |
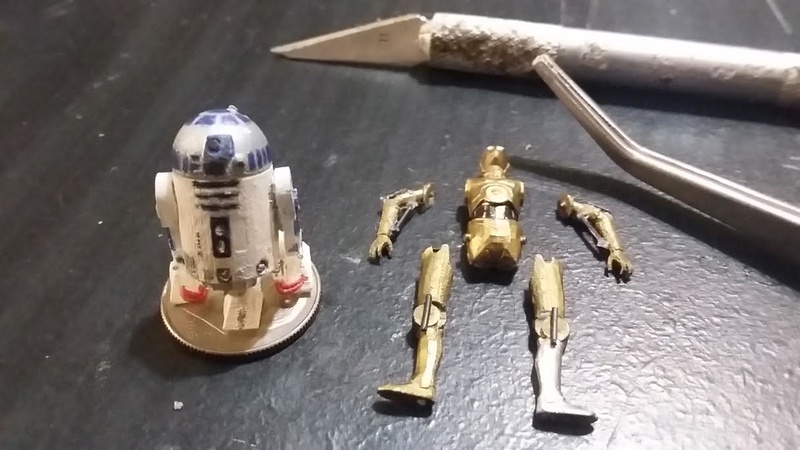
| You can get a set on Shapeways Bryguy! Just look thru my shop... they are tiny thou... might actually work in your Jabba Throne Room! but probably not. I think they are a bit too big for that. |
|
| | |
LrdSatyr8
Imperial Admiral
Posts : 631
Join date : 2013-01-01
Age : 57
Location : South Carolina
| | Subject: Re: LrdSatyr's DeAgostini Millenium Falcon Diorama Build Mon Sep 26, 2016 2:15 pm | |
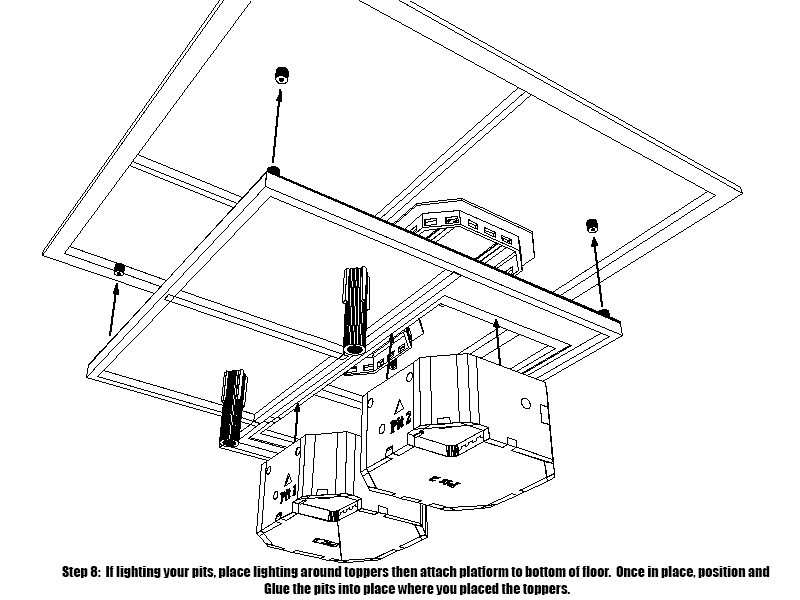
| Ok folks... time to add a new update to my build. I've been getting alot of questions about my new corridor sconce light sets on Shapeways. 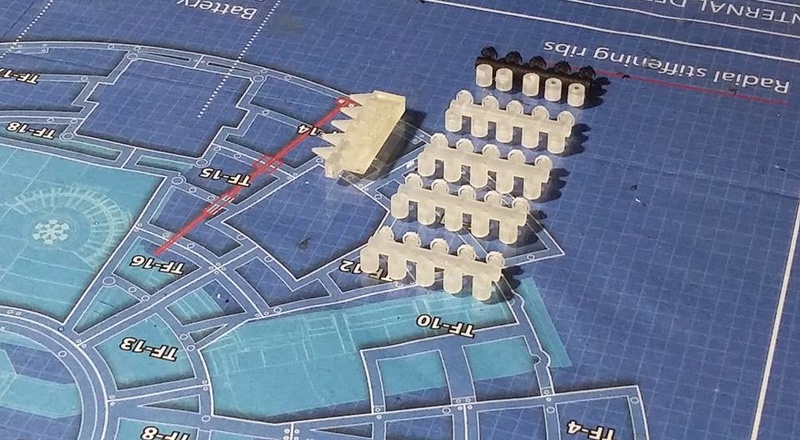 They both (the ESB and ANH versions) come with this little tool I designed called the Drill Guide. 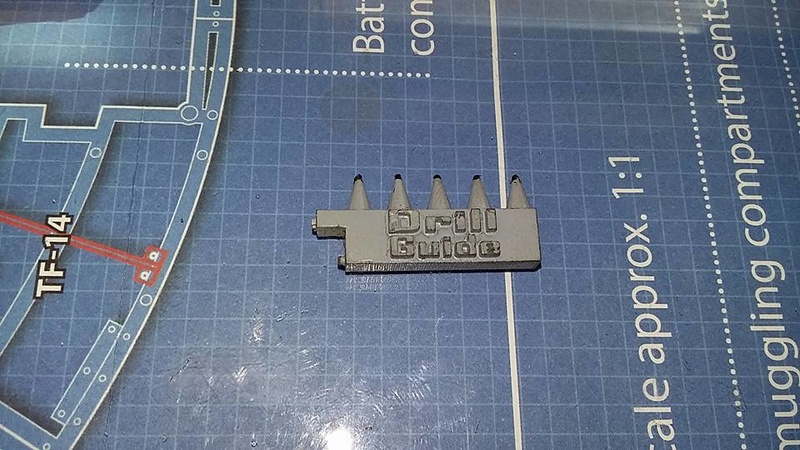 But yet, no one can figure out how to use it. I painted it with primer so it's easy to see... It's really simple to use... here's how: First things first, identify the top of each cushion that needs a light on it. On the back mark the top position so you don't forget. Then, take the edge of my tool and place it on the top edge as shown and push it against the surface of the cushion. Rub it back and forth creating a very light mark on the plastic (not so hard it does damage, and not so light you can't see it). You can prepaint the cushion whatever color you want and it'll make the marking a bit easier as well... 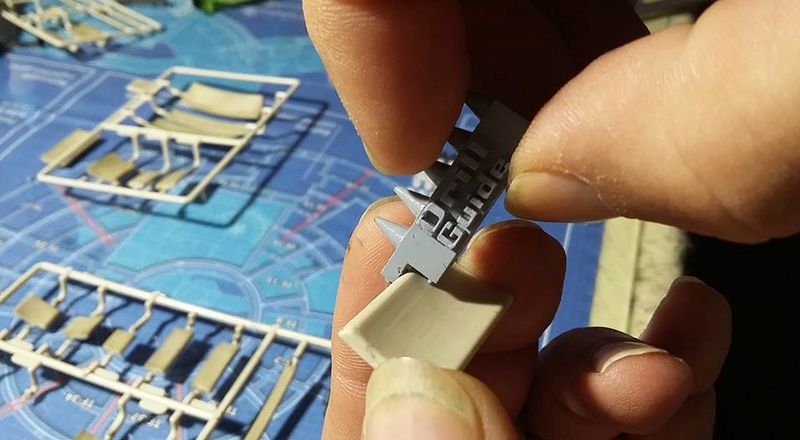 Next, dip the pointed marker ends in a little bit of paint (doesn't really matter what kind, I like to use watercolor or arcylic paint here because it can be removed easily if I make a mistake.  Next, touch the painted tips to the surface along the line you "rubbed" into the cushion previously. Just a dot of paint is all you need. These will be the drill points where you will drill a hole. 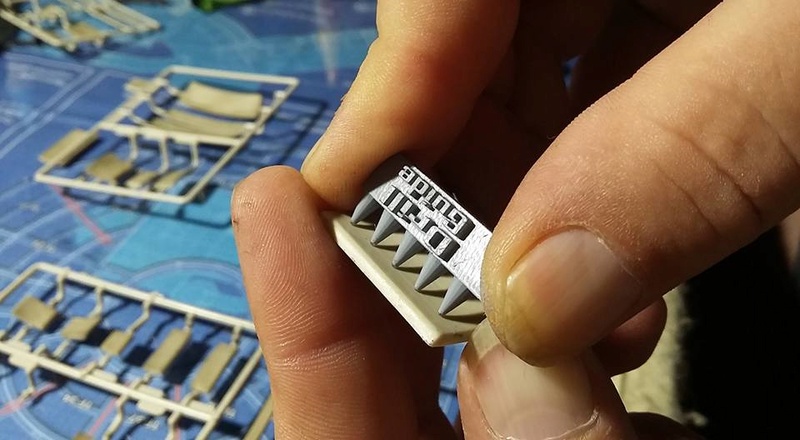 Some have worried about how it will work with the convex or concave cushions, well never fear, just by tilting it sideways you can still get a good point mark on those cushions easily as you can see below! Convex Cushion:  Concave Cushion: 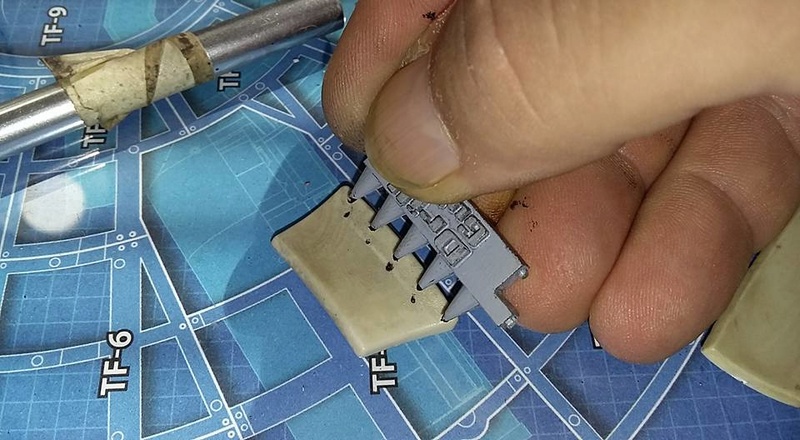 You should now have perfectly spaced dots on each cushion. 5 for the large cushions (try to center them as best you can), 3-4 for the medium cushions and only 1 for the small ones. Now, you want to prepare your holes for drilling, so, take a sharp hobby knife and prep your drill holes. You don't want to make these too big, just large enough to give the drill bit something to grab onto as you start drilling your holes. Make the starter holes for each pin point marking you made earlier. Try to be as precise as possible in this step. If you move off the first line you made it'll show later.  Next you want to take a small drill bit (here I got a 1/16th) and begin drilling the holes in each cushion where you made your marking starter holes. 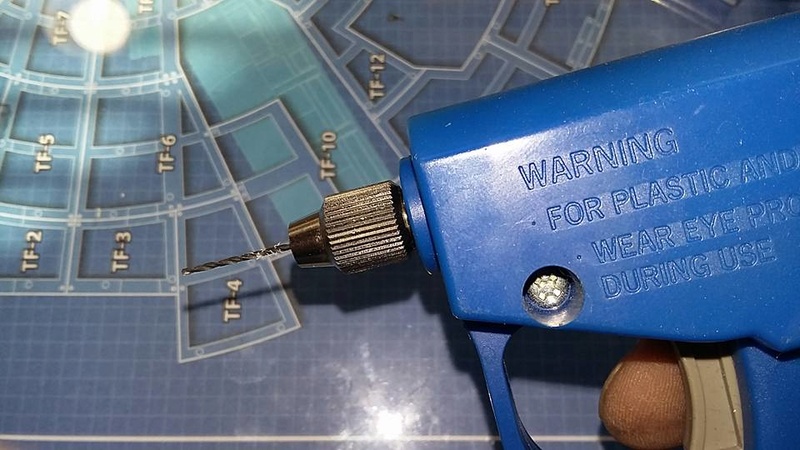 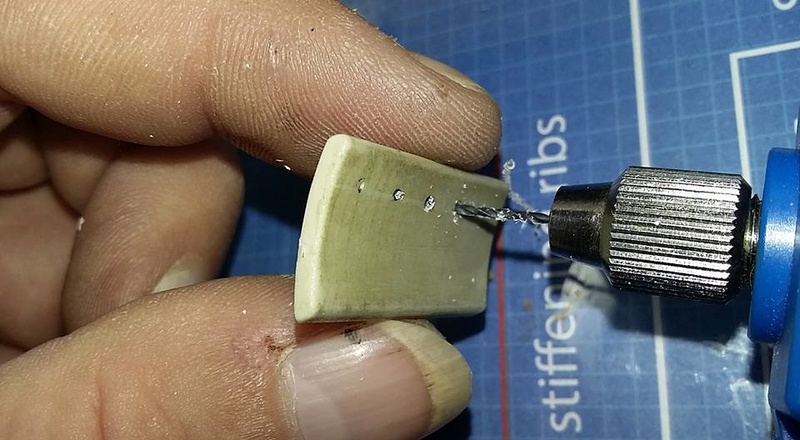 Now that you got all your small holes drilled, you have 2 options here. #1 you can begin gluing and drilling the large holes all the way thru both the cushion and the corridor parts or #2 you can set the part on the corridor and using the small holes drill thru the corridor. I chose the second option here because my larger drill isn't very delicate, so I have to be careful when I drill with it.  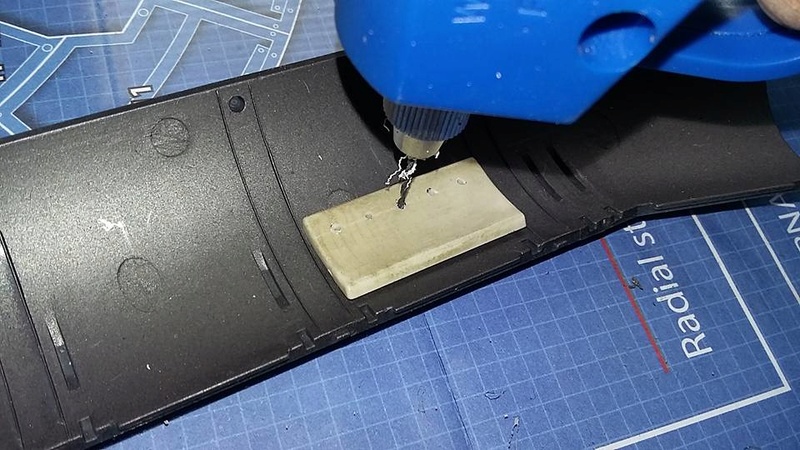 The drill bit to use for my corridor lights will be a 5/16th inch or 3.8mm bit. 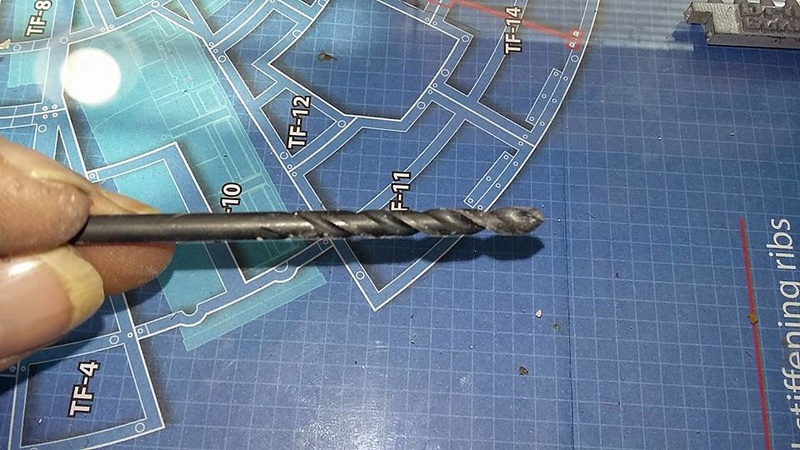 Yes I know, an extra step! LOL  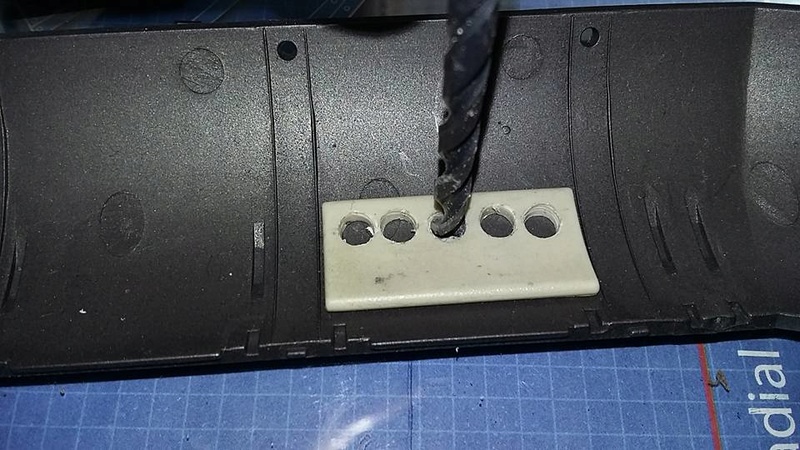 Now that all the holes are drilled you're ready to install the lights. Hope this helps and enjoy! 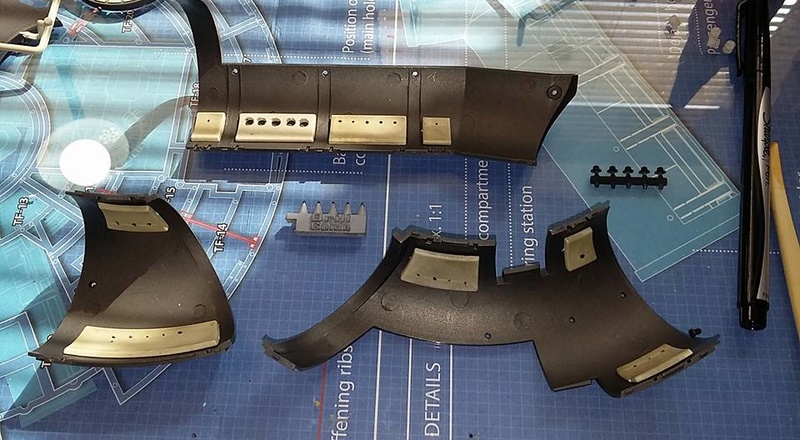 |
|
| | |
trappedtexan
Moderator
Posts : 4772
Join date : 2012-12-01
Location : USA, Texas
| | Subject: Re: LrdSatyr's DeAgostini Millenium Falcon Diorama Build Tue Sep 27, 2016 10:16 am | |
| Nice job. Making a tool to help with a kit is thinking outside the box. Most think of printing to be for a part itself not a tool for the part. And good step by step tutorial here. |
|
| | |
LrdSatyr8
Imperial Admiral
Posts : 631
Join date : 2013-01-01
Age : 57
Location : South Carolina
| | Subject: Re: LrdSatyr's DeAgostini Millenium Falcon Diorama Build Tue Sep 27, 2016 11:29 am | |
| - trappedtexan wrote:
- Nice job. Making a tool to help with a kit is thinking outside the box. Most think of printing to be for a part itself not a tool for the part. And good step by step tutorial here.
Thanks bro. I've been trying to make things that help rather than hinder. |
|
| | |
darthmatt22
Developer
Posts : 1769
Join date : 2015-09-29
Age : 34
Location : New Jersey, USA
| | Subject: Re: LrdSatyr's DeAgostini Millenium Falcon Diorama Build Tue Sep 27, 2016 10:45 pm | |
| Man..so much detail is going into this. The reveal is going to be INSANE!  |
|
| | |
LrdSatyr8
Imperial Admiral
Posts : 631
Join date : 2013-01-01
Age : 57
Location : South Carolina
| | Subject: Re: LrdSatyr's DeAgostini Millenium Falcon Diorama Build Wed Sep 28, 2016 10:22 am | |
| - darthmatt22 wrote:
- Man..so much detail is going into this.
The reveal is going to be INSANE! I'm trying to get as much detail as possible into this. Thanks for that bro! |
|
| | |
LrdSatyr8
Imperial Admiral
Posts : 631
Join date : 2013-01-01
Age : 57
Location : South Carolina
| | Subject: Re: LrdSatyr's DeAgostini Millenium Falcon Diorama Build Wed Nov 16, 2016 3:37 pm | |
| As usual I've been busy making new parts for this thing. Just put in an order for a whole slew of fiber optic cables in various widths recently and am waiting for them to arrive. Until then, I designed a set of landing gear bay doors that are very accurate to the movie. Here's what they look like on Shapeways... 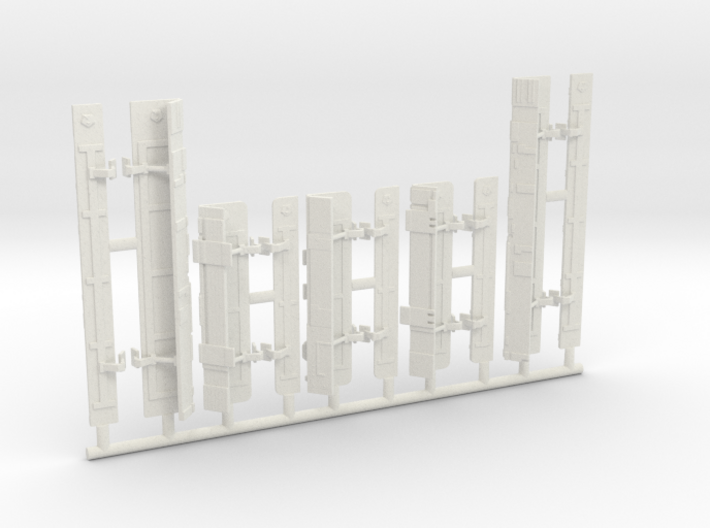 Here's a screencap from the movie to show you what I am talking about. They are the bay doors that close over the landing gear when they retract into the hull. Here's the screencap.  If anyone is interested, here's the link for the parts: http://shpws.me/MVzo Lemme know what you think!
Last edited by LrdSatyr8 on Thu Jan 28, 2021 8:39 am; edited 1 time in total |
|
| | |
trappedtexan
Moderator
Posts : 4772
Join date : 2012-12-01
Location : USA, Texas
| | Subject: Re: LrdSatyr's DeAgostini Millenium Falcon Diorama Build Wed Nov 16, 2016 11:44 pm | |
| Bout time you got back to work on this thing. I will probably be collecting social security before it's finished.  |
|
| | |
LrdSatyr8
Imperial Admiral
Posts : 631
Join date : 2013-01-01
Age : 57
Location : South Carolina
| | Subject: Re: LrdSatyr's DeAgostini Millenium Falcon Diorama Build Thu Nov 17, 2016 8:32 am | |
| What can I say... I'm a busy guy! Besides... only got 12 more issues (3 more months) to go before I have all the parts. Then I can really start gluing things together! |
|
| | |
ArtooDetour
Admin
Posts : 9074
Join date : 2010-03-13
| | Subject: Re: LrdSatyr's DeAgostini Millenium Falcon Diorama Build Sun Nov 20, 2016 3:53 pm | |
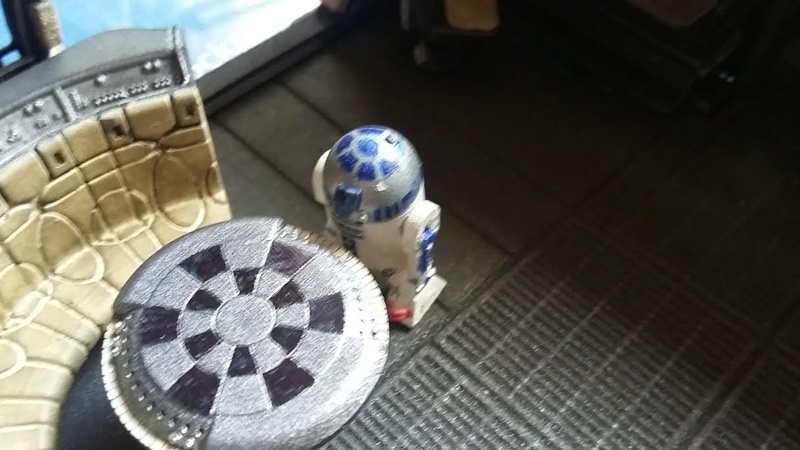
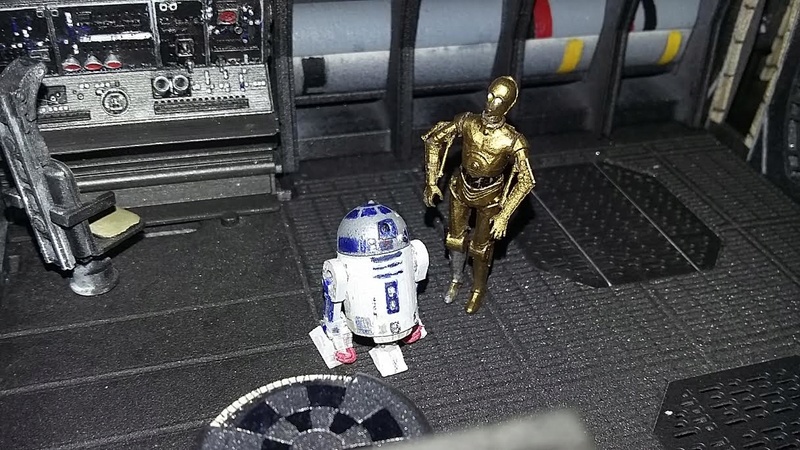
| That's coming on great. How cool do the mini R2 and 3PO look in that cargo lounge  |
|
| | |
DarthBerizing
Johnpaul Ragusa


Posts : 7050
Join date : 2009-11-24
Age : 51
Location : Dutchess County, NY
| | Subject: Re: LrdSatyr's DeAgostini Millenium Falcon Diorama Build Mon Nov 21, 2016 9:44 am | |
| Looking great!!
The amount of patience you need is staggering , well done! |
|
| | |
LrdSatyr8
Imperial Admiral
Posts : 631
Join date : 2013-01-01
Age : 57
Location : South Carolina
| | Subject: Re: LrdSatyr's DeAgostini Millenium Falcon Diorama Build Fri Mar 10, 2017 10:31 pm | |
| |
|
| | |
Sponsored content
| | Subject: Re: LrdSatyr's DeAgostini Millenium Falcon Diorama Build | |
| |
|
| | |
| | LrdSatyr's DeAgostini Millenium Falcon Diorama Build | |
|