| | The Lar's Homestead Diorama |    |
|
| Author | Message |
|---|
General Kahn
Force Addict


Posts : 3099
Join date : 2011-04-10
Age : 44
Location : England
 |  Subject: The Lar's Homestead Diorama Subject: The Lar's Homestead Diorama  Sun Dec 07, 2014 5:32 pm Sun Dec 07, 2014 5:32 pm | |
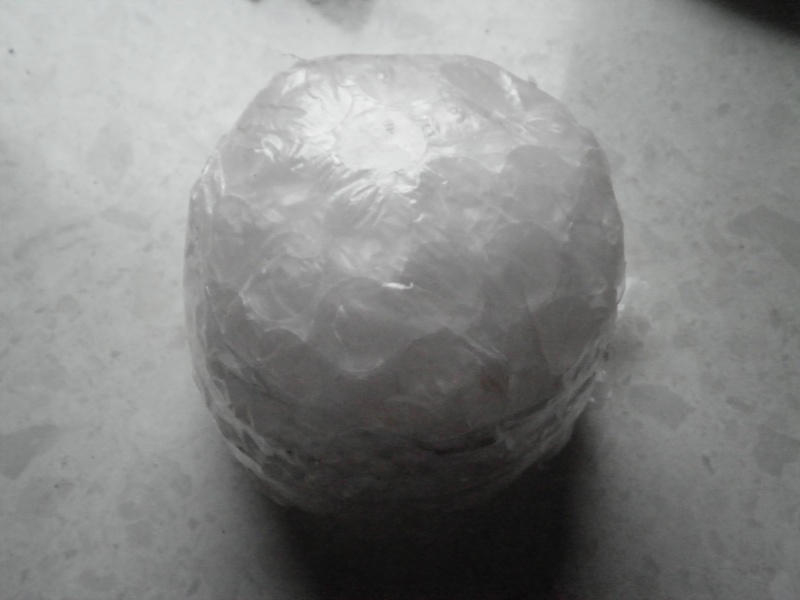
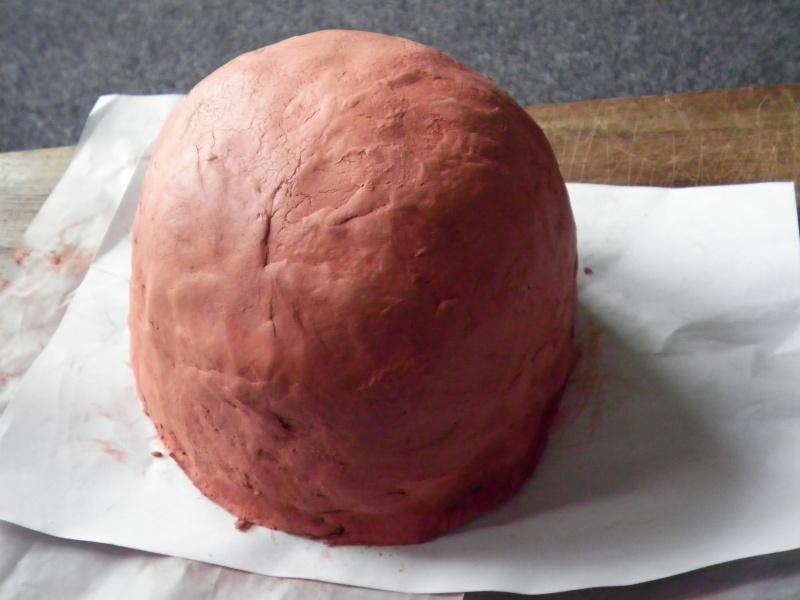
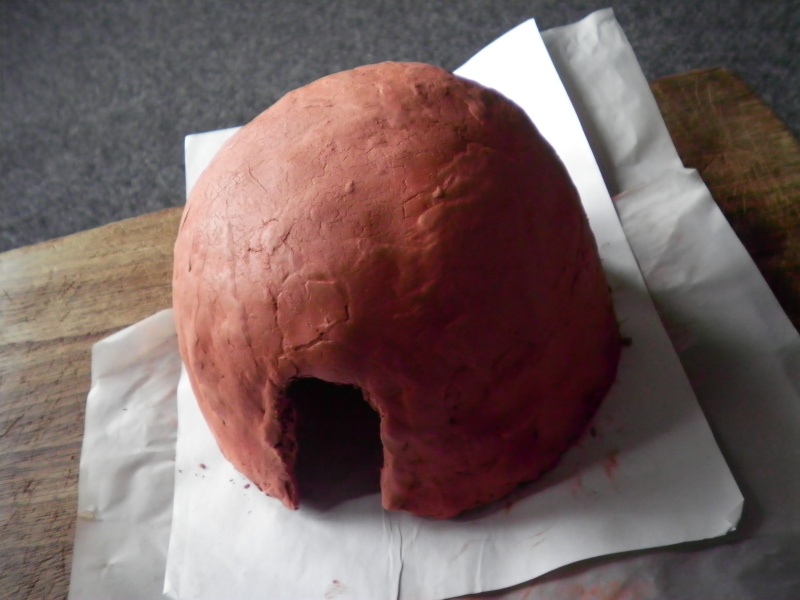
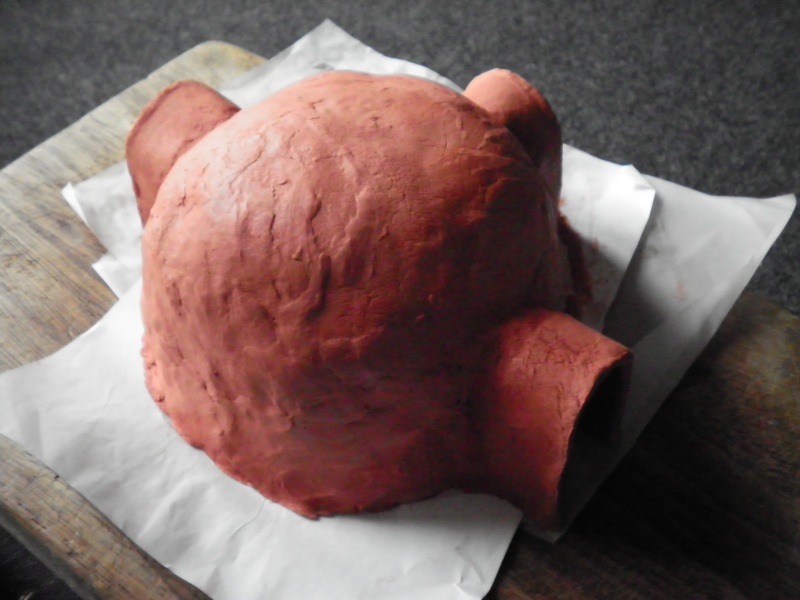
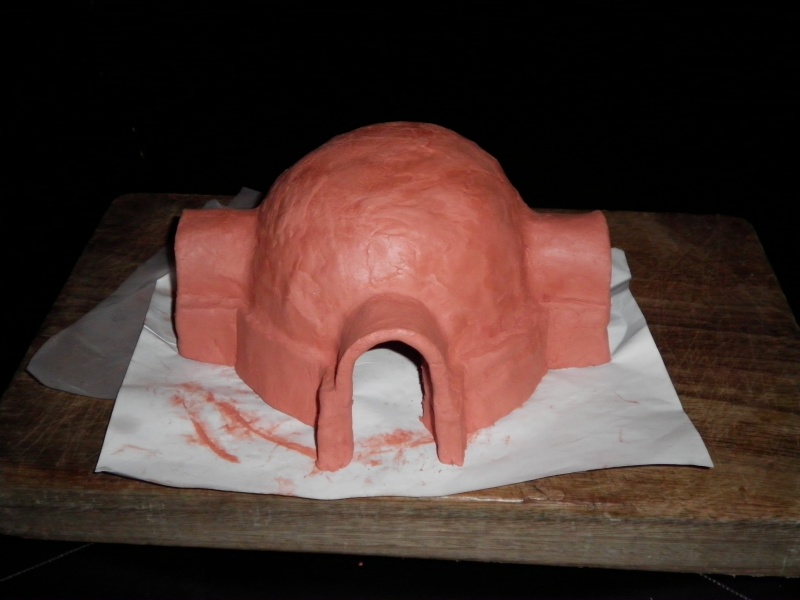
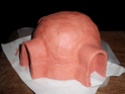
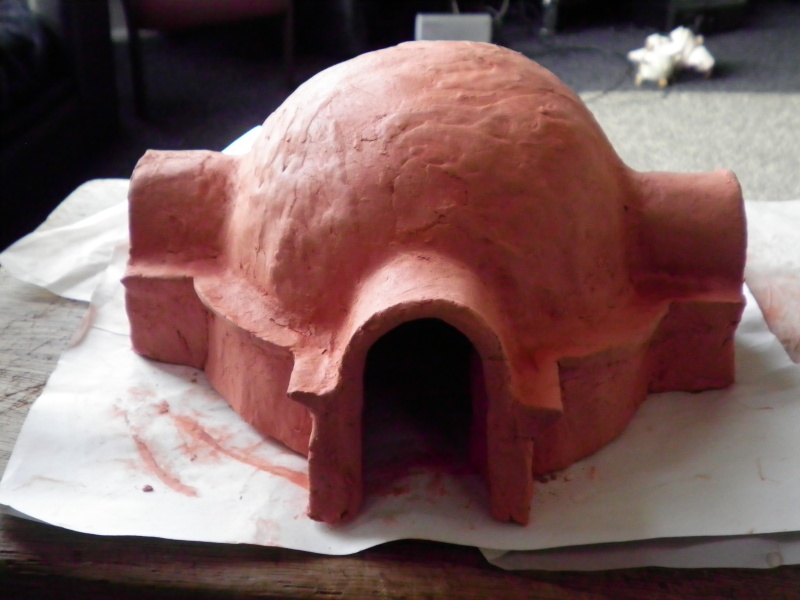
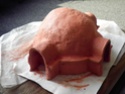
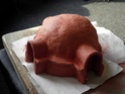
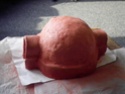
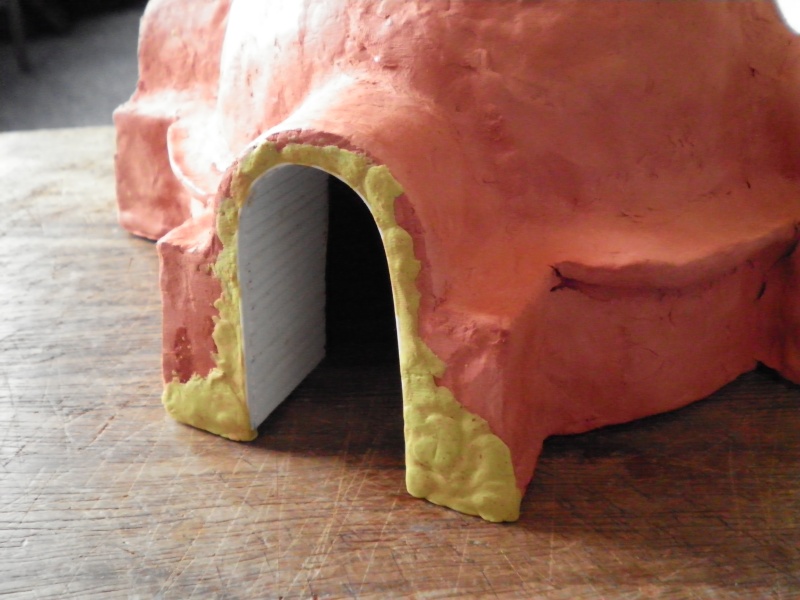
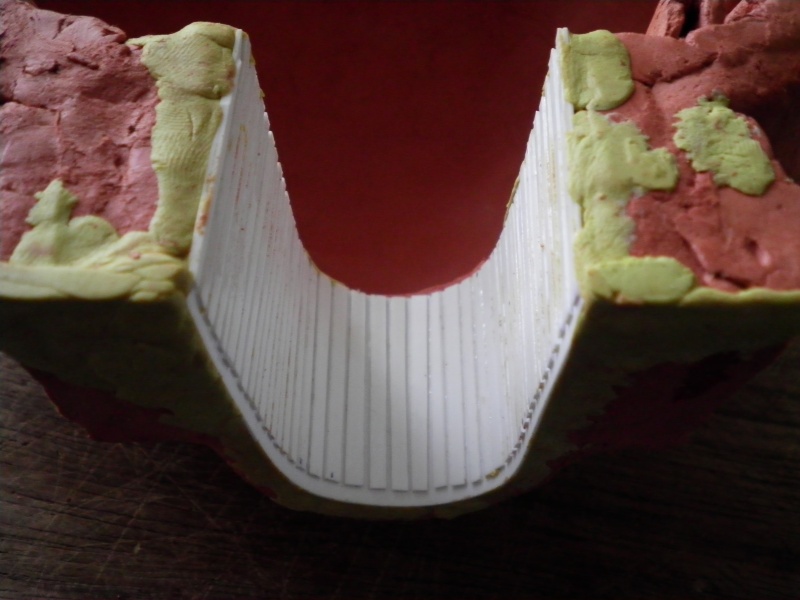
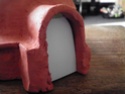
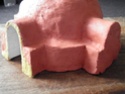
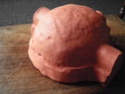
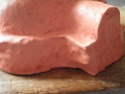
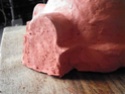
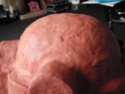
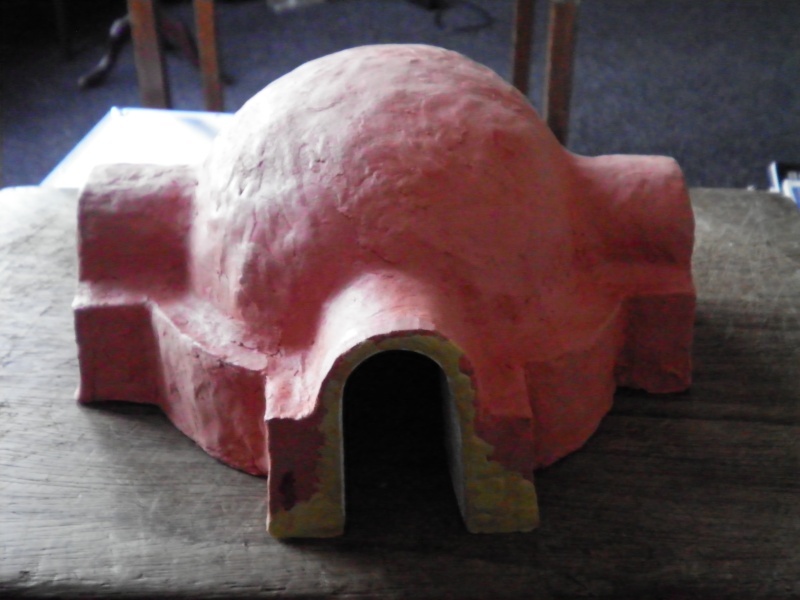
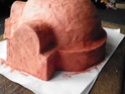
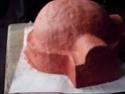
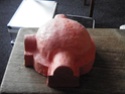
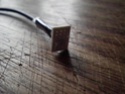
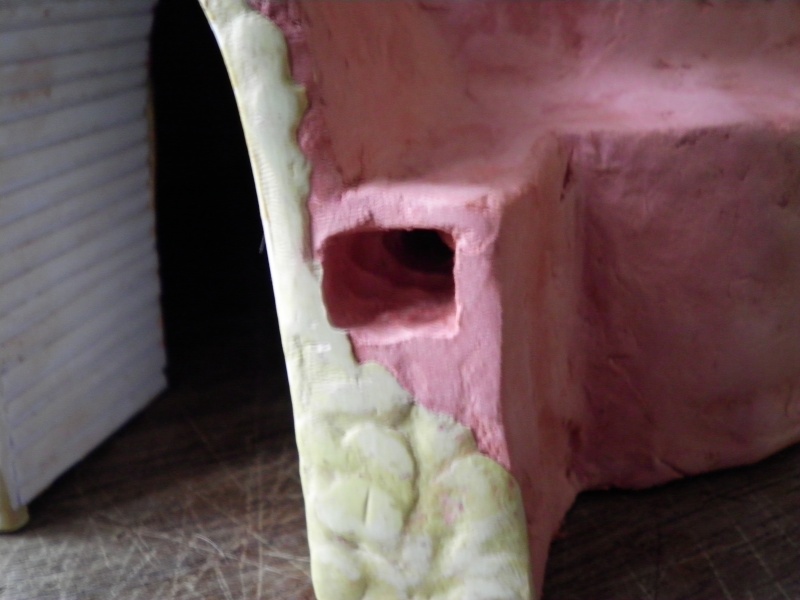
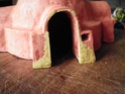
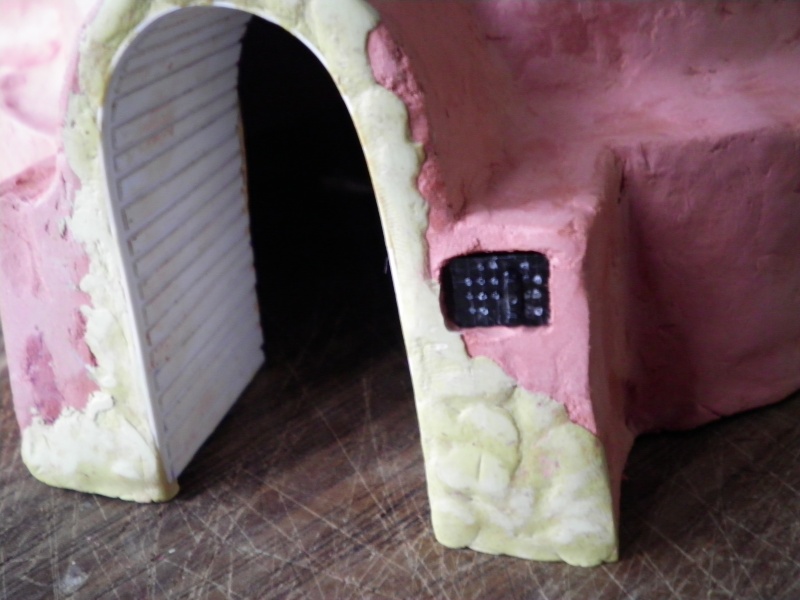
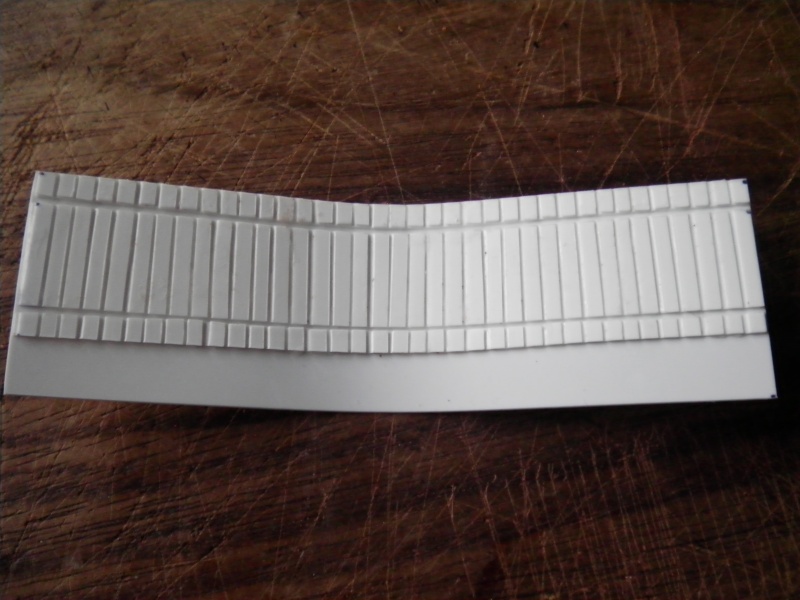
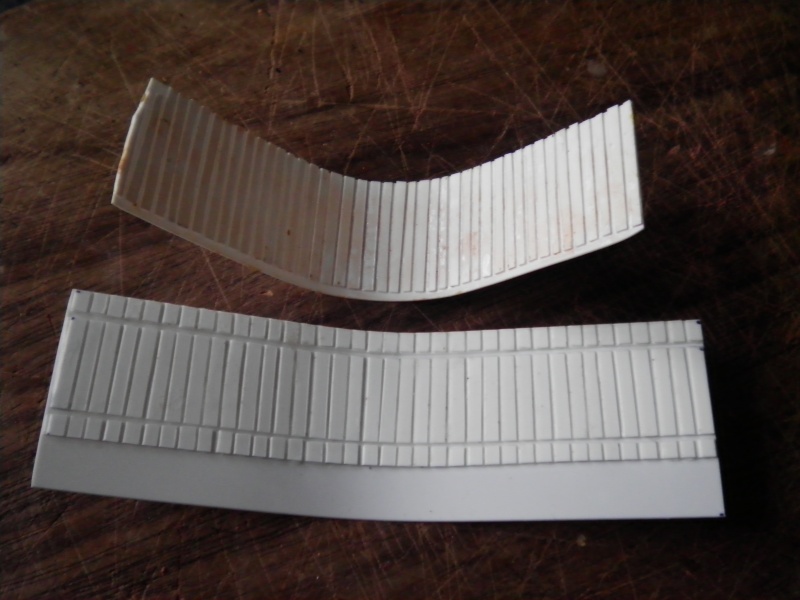
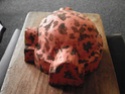
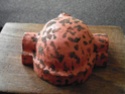
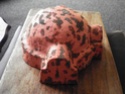
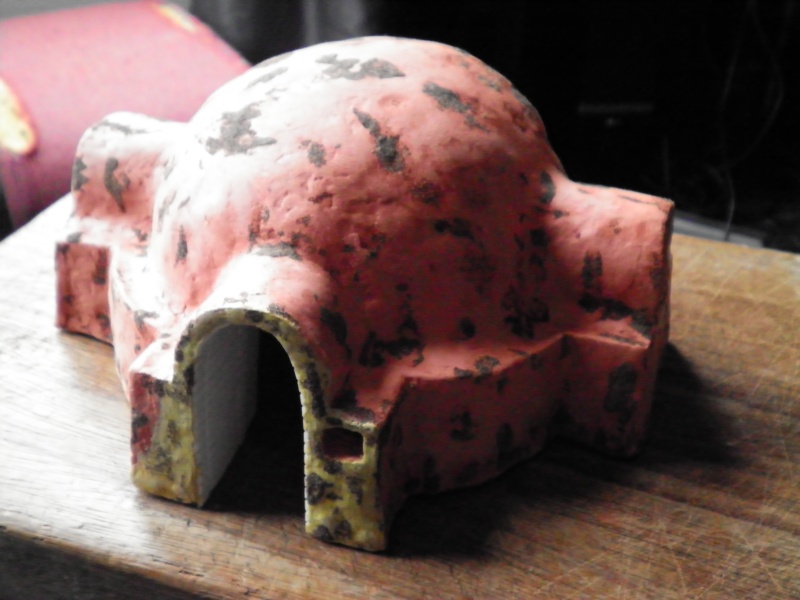
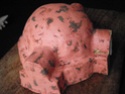
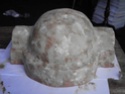
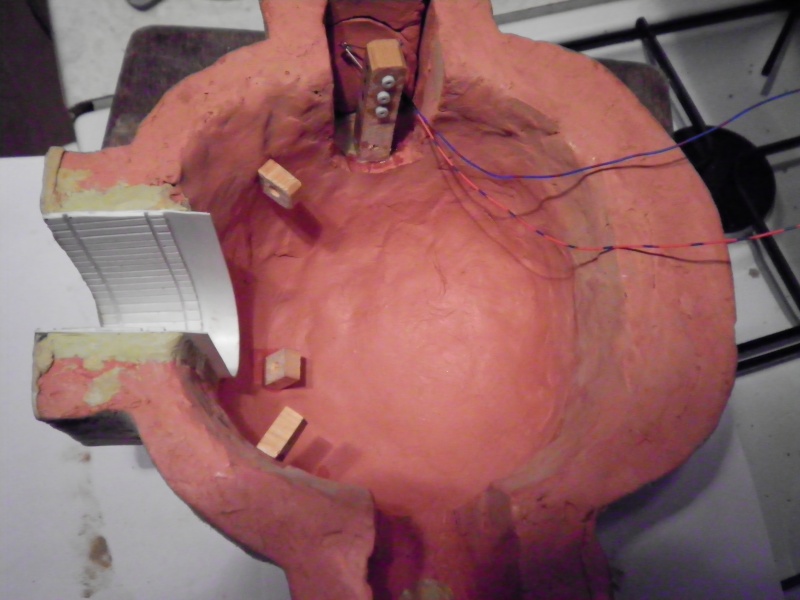
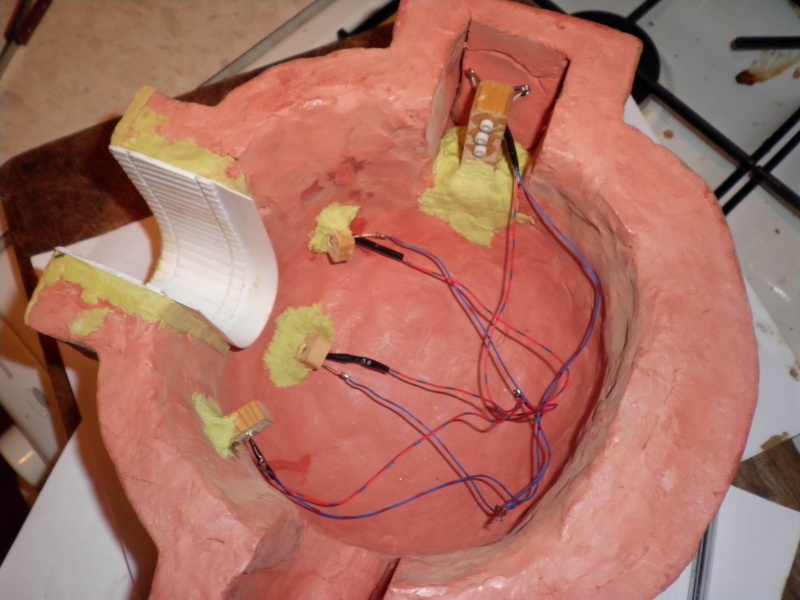
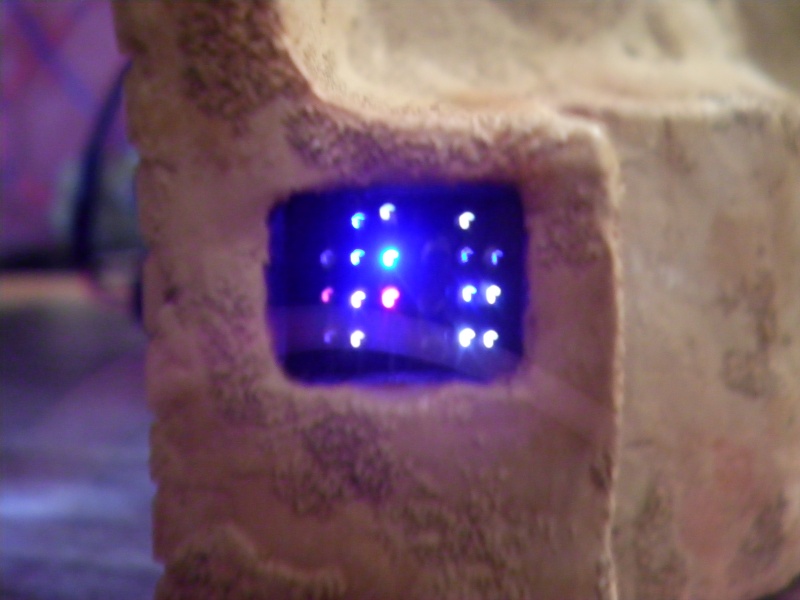
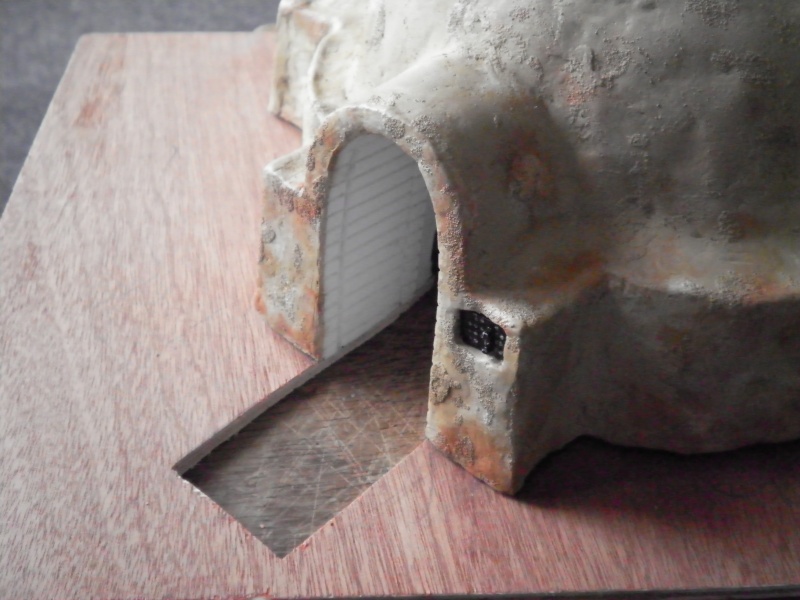
| Hi folks, Sorry I have been somewhat inactive lately, lots going on, but the reason I have not been active as much in the Customs section is because of this project which began one night months ago out of sheer bordem and fast became a labour of Love  I had a couple of packs of air dry clay at home that I was planning on using for a none Star Wars project. How ever I didn't have the shit I needed and so it was just sat there, one packet was open which isn't good as once you break the seal it's hard to stop it going hard eventually so you have to kind of use it up. Knowing this I had been thinking of something to do and then one night a thought just popped in there.... Luke's House! For fuck sake, it's basically a mud hut, how hard can it be! Turns out, harder than I thought! But what isn't I guess  And so it began! Now because of the air dry clay I had to do it in stages, working it up in layers. Because it needs at least 24 hours often more depending on how thick it is, I could only do so much at a time. This is why it took so long but also allowed me to photograph the entire process from start to finish (at the time of this writing, it's still not 100% finished). Every stage documented, apart from a couple at the end where I got carried away and forgot to take pics  Anyway, here it is The Lar's Homestead First of all I needed a dome shape roughly the right size... Seriously though, who the fuck has a correct ize dome kicking about, but due to my shocking impatience I improvised This involved some industrial bubble wrap, balled up and taped up and then taped in to shape. Next, I rolled out a lump of clay and jst kind of put it over the bubble wrap and then rather crudely cut a door way in to it. Next stage was just a case of adding a new layer to smooth out the bottom edge which kind of looked like a Jellyfish. Stage 3 was adding the door entrance and the side areas which where initially done by simply rolling out 3 strips of clay and the arching them into shape and adding them to the shell. The next stage basically involved adding the 'step' around the house, I did this by roling out a strip of clay and adding it. I then extend the lip of the 'step' to make it larger and more accurate. I also added the back strip. Next I started to fill the void below the lip. I decided to work a little more on the entrance. For the interior I used a strip of polystyrene sheet with thin strips of the same sheet glued to it. Once in place I attached it with Milliput and then added more Milliput to the door surround to make it fit better. I would ultimately remove this and replace it with a more accurate interior. Using the same polystyrene sheet I made some make shift blocks for the two other 'entrance type things' to reduce the amount of clay I would have to use. After this I just continued to work more on the 'step' around the house, building it up so the right size and working on the back step, I also added little clay bits to the other all dome to make the shape more accurate and smoother although I had by this stage decided to keep the general rough look created by the clay because I thought it added 'character' to the overall project, and it's how I imagine it would look in reality. Then I little sanded the full surface of the house, not too smooth it, as like I said before I wanted that natural look. For the next stage I decided that I wanted to add some electronics to the project. Firstly I decided to add the control panel near the door. Now on screen it's not lit up that I can tell but I decided I wanted to light it up, basically abuse some fiber optic stuff I had kicking around from an old model that I never used. It ultimately didn't work perfectly but is o.k. and was very hard to do, real arse a fathy! I basically used a piece of plastic from the model kit and glued a second piece of plastic to it for detail. I then pierced holes through it with a pin. I then made a basic holder for the LED's using a piece of wood and some plastic tubes (from the model kit) and then added the fiber optic cable (which was a toral fucking arse) Finally I painted the panel front black. (ultimately several of the optics don't illuminate but overall it's o.k. Next I drilled a hole in the entrance and bored it out to size. Next up.... the new entrance! I'd noticed that my original was actually wrong from the screen version so I decided that it had to go, so I made a new one.
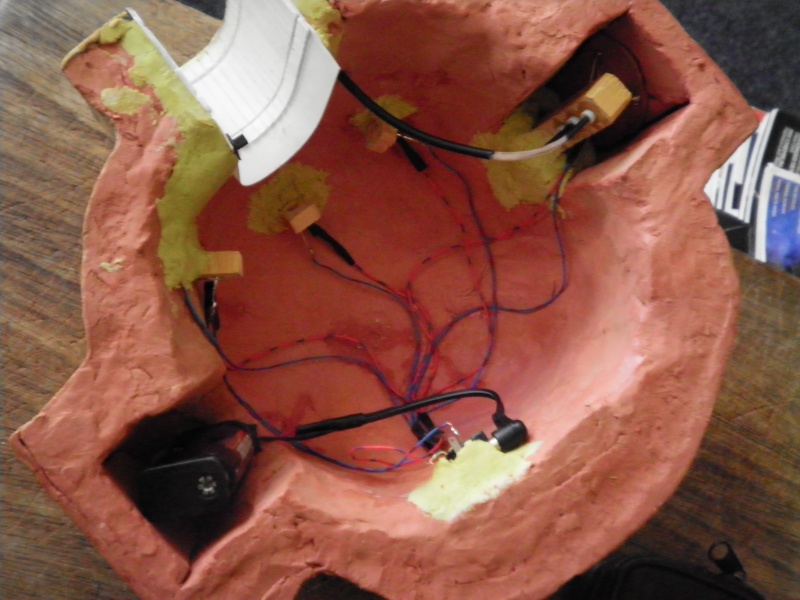
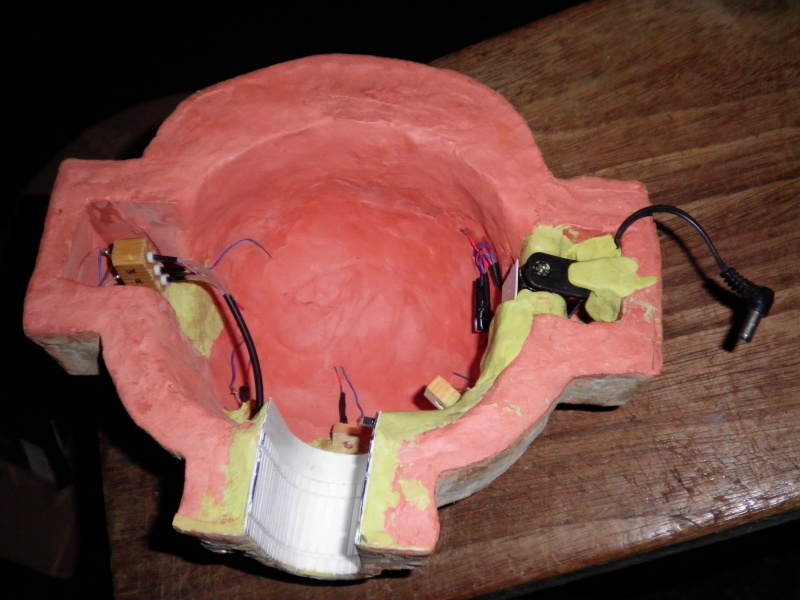
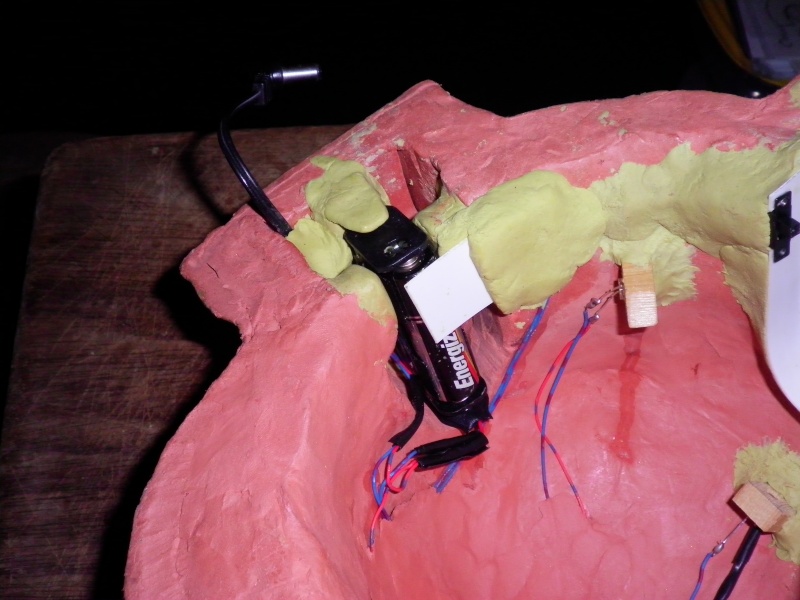
The new one features the two lines that run around the inside. I used the same principle as before and then added it to the entrance and used Milliput to edge it off and make a better surround for the control panel. Compared to the original At this stage I was happy with the overall shape after adding bits here and there so was now going to concentrate on the final look. First I wanted to add a bit more texture to the surface so I painted wood glue on o the surface in places and then covered it with dry sand from the beach. Once this had dried I sanded it down leaving only the finer remnants leaving it looking more subtle. Next up was paint, I used a spray can for this, Desert Sand, the same as the one I used for my Luke Bespin Customs. I used the entire can, about 4 layers in total. After this, I used a sponge to apply patchy paint tp the overall surfacem I used white and two different brown and then finally re covered parts with the original Desert Sand paint using the same sponge technique. Next up.... electronics! I wanted the interior to be illumated as can be seen in the film so I added several LED's to the interior to illumniate from beind the door. The wiring is up there with the worst  I added an in/off switch in the door frame and also added a connector so that I could disconnect the battery pack. I would later remove this in order to use it to connect the house to the base. I used Milliput to hold everything in place. The later alteration I made was to remove the connector and use it to connect the power supply to the base. I also added more Milliput to keep the battery pack secure and a strip of bendable polystyrene sheet to hold it in place but also allow it to be removed.
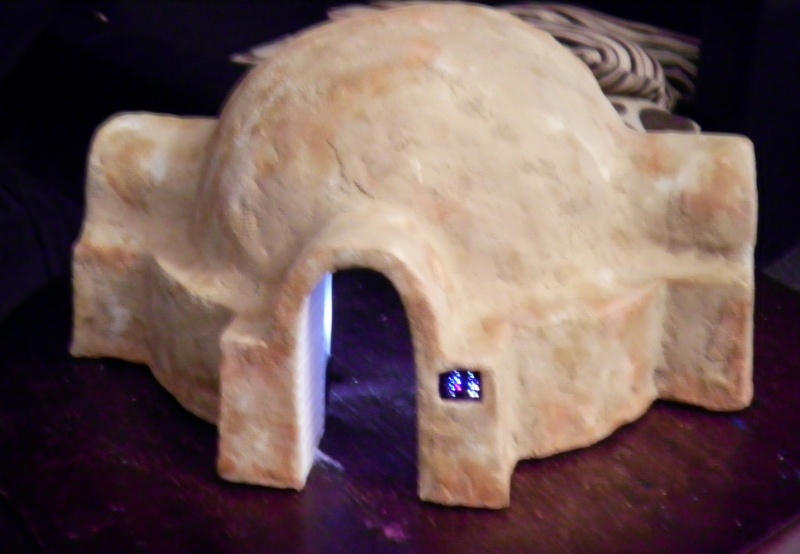
I also added more clay to the interior to cover the wires when viewed from the door entrance. And here is the lights turned on
Last edited by General Kahn on Tue Dec 09, 2014 4:36 pm; edited 3 times in total |
|
 | |
General Kahn
Force Addict
Posts : 3099
Join date : 2011-04-10
Age : 44
Location : England
| | Subject: Re: The Lar's Homestead Diorama Sun Dec 07, 2014 5:32 pm | |
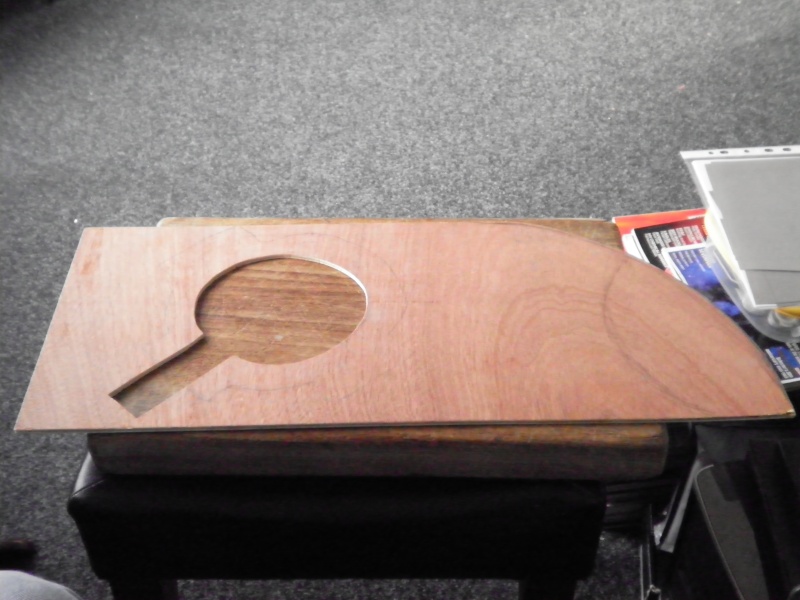
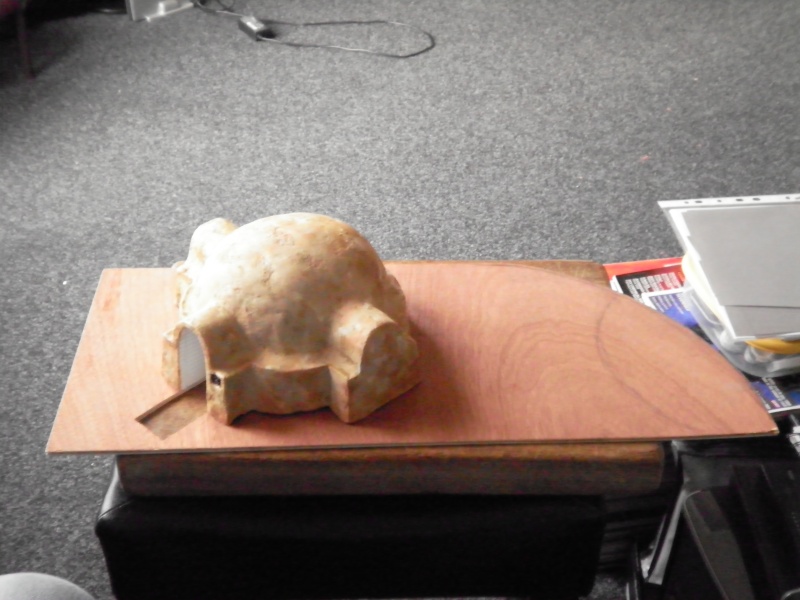
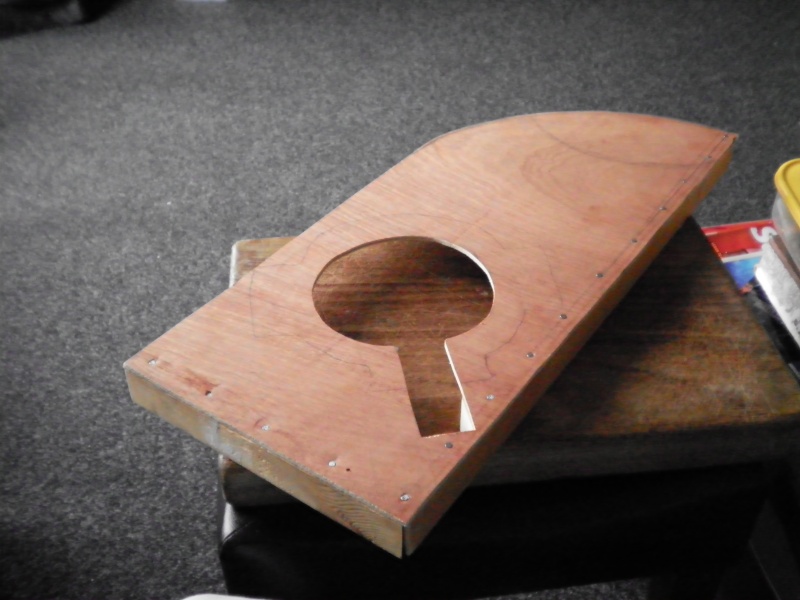
| The Lars Homestead - Base The base for the homestead is designed to fit into a display cabinet I have that will one day hopefully ... display my stuff! I was lucky really because I didn't di any measurements for the house and it just squeezes on the base.... JUST! The base will be in the end of the cabinet so I cut a piece of wood and rounded it off so there wasn't a sraight corner. EVentually an illuminated sunset display will be behind this Once the base shape was cut I positioned the house and then cut out the interior. I then used some wood to raise the base to A, allow for the steps and B, allow for the display cabinets door frame. Next was the lights to further illuminate the interior. For this I cut to crescent shaped pieces of wood and placed LED's around them and then fixed them in position with dowel. I drilled a hole for the connecting lead from the house and fitted the connector to the underside of the base and then connected the wiring, again in true cowboy style!! I then used two strips of Polystyrene sheet to block out the wires from the inside, this is slightly opaque so light shines through. After this U used two more polystyrene strips for the edge of the stair well and made the steps using clay. 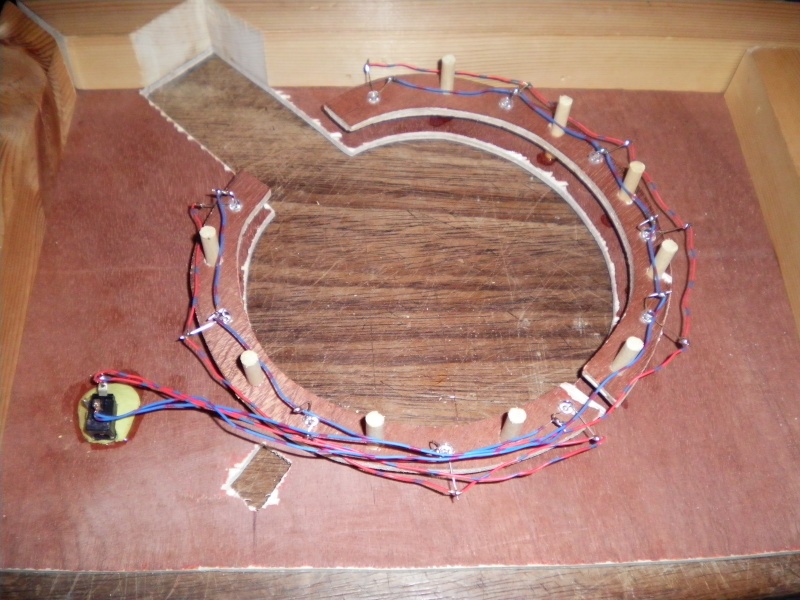  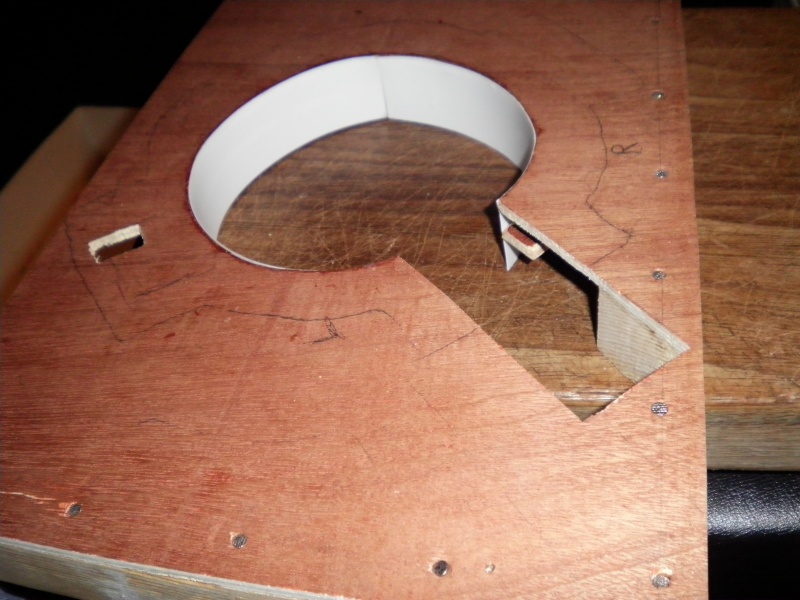  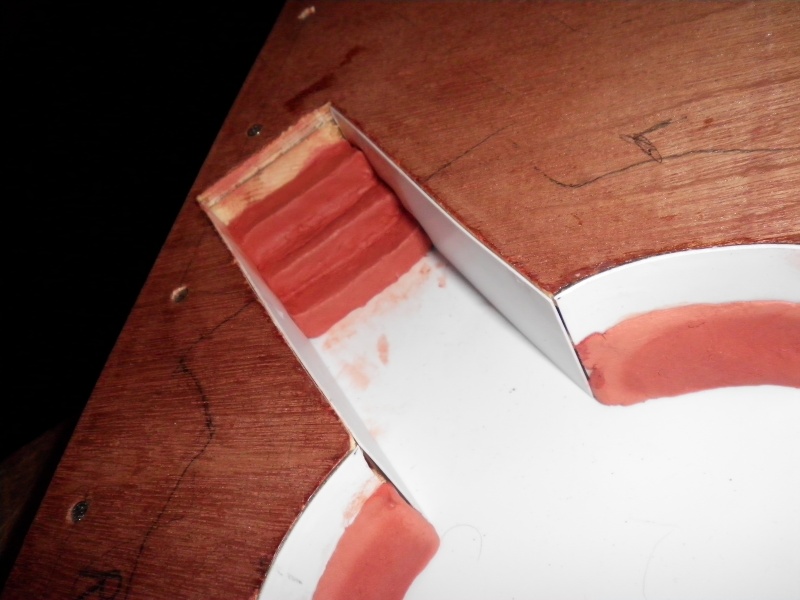 Unfortunately, the next few stages I kind of missed as I got carried away and forgot to take photographs In all, I used polystyrene again to edge the stair well on top and then lined the interior bottom wall with clay. I also extended the interior design of the entrance onto the lower section. I then used clay and smeared it over the top of the whole base to give a slightly uneven surface and to create a lip where the homestead would sit. I also used a 30th Anniversary Collection Moisture Vapourator and made an inprint for it to sit in and finally I created the rocky ridge where Luke stands using clay. Once this was done I used glue to cover the entire surface with sand, leaving only the rocks exposed. Then I used some shop bought larger size gravel and glued this in various places to give it a more 'deserty look' Finally I sprayed the entire base with Desert Tan. This worked perfectly and had an unexpected side effect, when it dried it left two very different colours, light on the rock (clay) and the correct dark colour on the sand which basically saved me a job and although I did originally intend to add more colour I was happy with the result so I left it as it is. 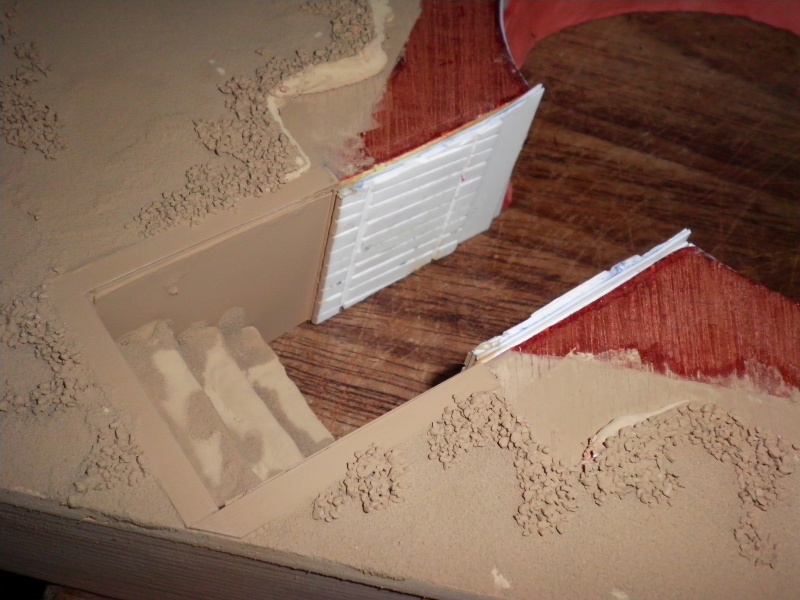 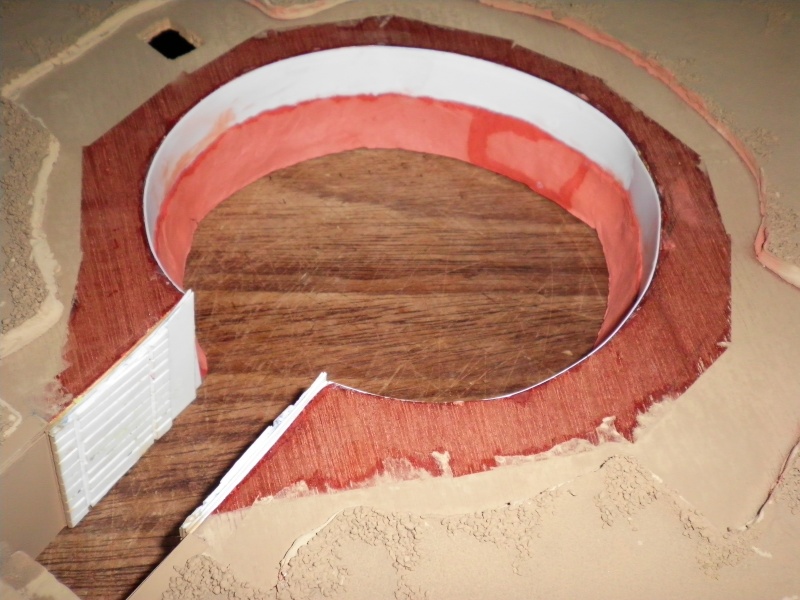  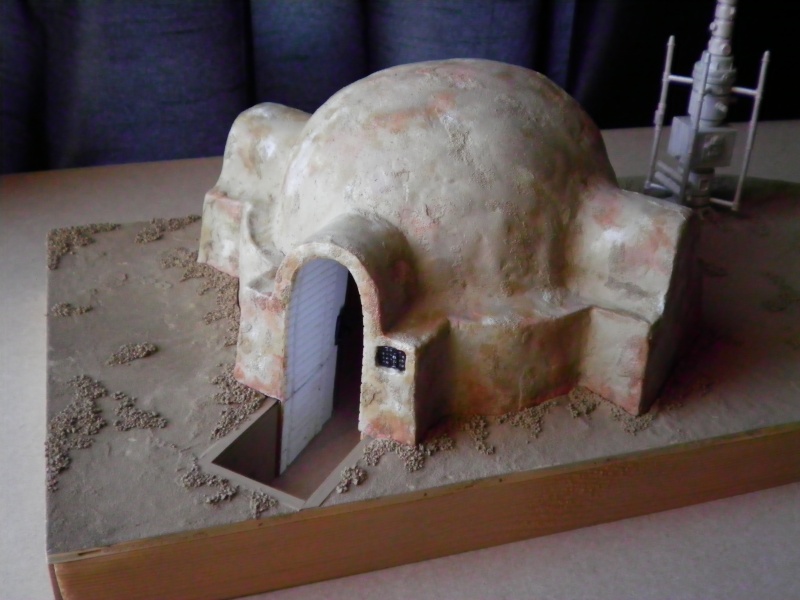 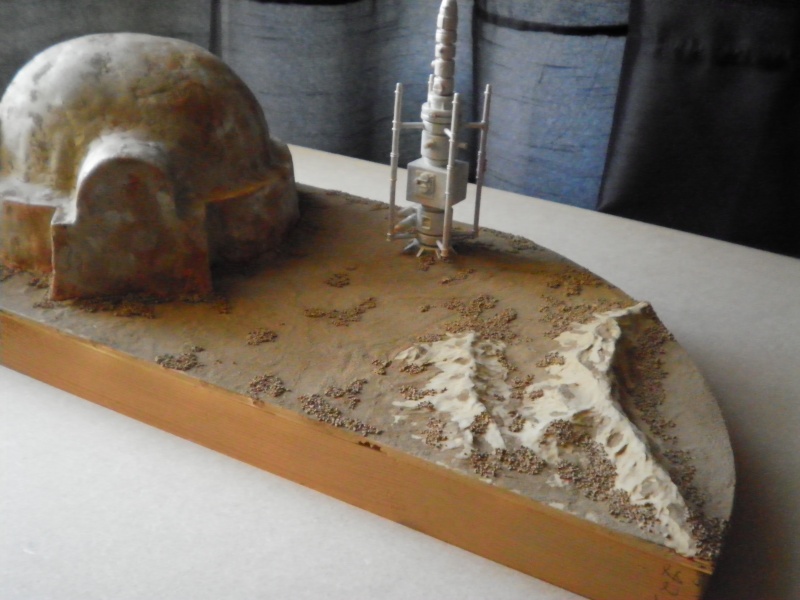 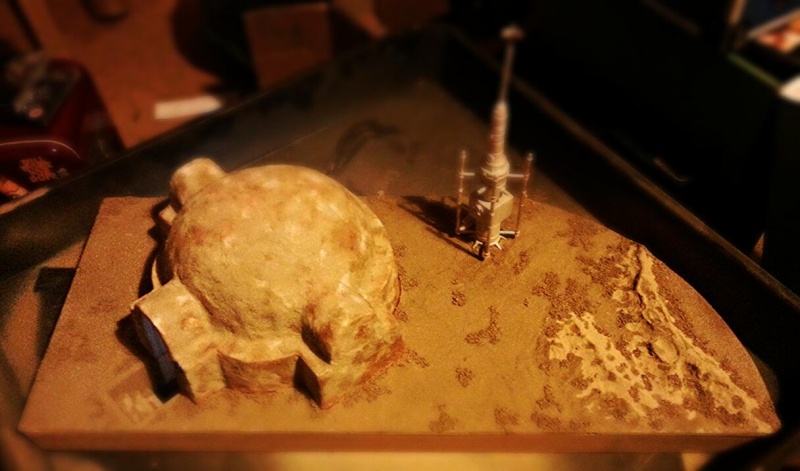 
Last edited by General Kahn on Thu Dec 11, 2014 2:33 pm; edited 2 times in total |
|
| | |
Commander Clint
TIG Benefactor

Posts : 1996
Join date : 2012-04-10
Age : 54
Location : Cambridge, Ontario, Canada
| | Subject: Re: The Lar's Homestead Diorama Sun Dec 07, 2014 7:12 pm | |
| Excellent idea and I'm glad you photographed the hell out of the project. I applaud your taking on such a big project.  I can't wait to see the rest of the pictures.  |
|
| | |
General Kahn
Force Addict
Posts : 3099
Join date : 2011-04-10
Age : 44
Location : England
| | Subject: Re: The Lar's Homestead Diorama Sun Dec 07, 2014 7:25 pm | |
| Cheers Clint There is like 90 pics or something, no need for all, but still a damn lot! Might take a week or so to get them all up... gimme time to finish it!  |
|
| | |
ourchickenshack
Force Addict

Posts : 4282
Join date : 2012-03-25
Location : Oklahoma
| | Subject: Re: The Lar's Homestead Diorama Mon Dec 08, 2014 11:19 am | |
| Loving the diorama Alex Are you going to add some Owen and Beru burnt up corpses ? I hope so  |
|
| | |
ArtooDetour
Admin


Posts : 9074
Join date : 2010-03-13
| | Subject: Re: The Lar's Homestead Diorama Mon Dec 08, 2014 12:06 pm | |
| Nice project, Alex. Looking forward to seeing this grow |
|
| | |
cantina_patron
TIG Benefactor

Posts : 5371
Join date : 2011-10-26
Age : 52
Location : UK
| | Subject: Re: The Lar's Homestead Diorama Mon Dec 08, 2014 12:07 pm | |
| Very nice Alex. One advantage of living in Scarborough, you'll be able to find plenty of sand for the base.  Are you going to do a back drop with the setting suns? |
|
| | |
General Kahn
Force Addict
Posts : 3099
Join date : 2011-04-10
Age : 44
Location : England
| | Subject: Re: The Lar's Homestead Diorama Mon Dec 08, 2014 12:34 pm | |
| Haha, the sand for the base and touch ups is straight from the beach and dried in the oven.... I forgot it was in and cooked it for two hours! The back drop is currently the only piece missing, I'm potentially having some help with that |
|
| | |
chris.75
TIG Benefactor

Posts : 1336
Join date : 2011-04-03
Age : 48
Location : UK
| | Subject: Re: The Lar's Homestead Diorama Mon Dec 08, 2014 1:18 pm | |
| Very cool Alex, nice work mate  That is gonna look awesome once finished, will you add interior lighting too? |
|
| | |
Dr Dengar
TIG Benefactor

Posts : 7048
Join date : 2010-05-07
Age : 52
Location : The Netherlands
| | Subject: Re: The Lar's Homestead Diorama Mon Dec 08, 2014 1:30 pm | |
| Great looking project, Alex! Looking forward for your updates. BTW: if you need a Moisture Vaporator, you could maybe buy a Luke from the The 30th Anniversary Collection and then give it some weathering.  http://www.rebelscum.com/TAC18luke.asp |
|
| | |
General Kahn
Force Addict
Posts : 3099
Join date : 2011-04-10
Age : 44
Location : England
| | Subject: Re: The Lar's Homestead Diorama Mon Dec 08, 2014 3:24 pm | |
| @ James, the corpses wont fit onto the overall display unfortunately I do intend to make an Owen and Beru custom though @ Chris, yes it has lighting @ Marco, got two chief One is incorporated into the display
Last edited by General Kahn on Mon Dec 08, 2014 4:45 pm; edited 1 time in total |
|
| | |
walkie
Senior Developer


Posts : 5086
Join date : 2012-11-05
Age : 47
Location : UK
| | Subject: Re: The Lar's Homestead Diorama Mon Dec 08, 2014 3:39 pm | |
| Very nice work Alex, I look forward to seeing how this project progresses |
|
| | |
General Kahn
Force Addict
Posts : 3099
Join date : 2011-04-10
Age : 44
Location : England
| | Subject: Re: The Lar's Homestead Diorama Mon Dec 08, 2014 4:46 pm | |
| Final update of the night added Cheers for looking guys, and cheers for the comments |
|
| | |
psybertech
TIG Benefactor

Posts : 2906
Join date : 2013-01-30
Age : 51
Location : TX
| | Subject: Re: The Lar's Homestead Diorama Mon Dec 08, 2014 6:49 pm | |
| Looking real good man! Can't wait to see more pics!  cheers! |
|
| | |
arohk
Jedi Knight


Posts : 1615
Join date : 2012-06-27
Age : 58
Location : Canada
| | Subject: Re: The Lar's Homestead Diorama Mon Dec 08, 2014 9:45 pm | |
| That is very cool indeed my friend and ya as soon as I seen it the same thing popped into my head as well burnt up corpses of Owen and Beru. I think me been hanging around James to much lol
|
|
| | |
General Kahn
Force Addict
Posts : 3099
Join date : 2011-04-10
Age : 44
Location : England
| | Subject: Re: The Lar's Homestead Diorama Tue Dec 09, 2014 4:37 pm | |
| Updated again Cheers again guys |
|
| | |
trappedtexan
Moderator


Posts : 4772
Join date : 2012-12-01
Location : USA, Texas
| |
| | |
ArtooDetour
Admin
Posts : 9074
Join date : 2010-03-13
| | Subject: Re: The Lar's Homestead Diorama Wed Dec 10, 2014 12:11 pm | |
| That well cool with the light effects |
|
| | |
General Kahn
Force Addict
Posts : 3099
Join date : 2011-04-10
Age : 44
Location : England
| | Subject: Re: The Lar's Homestead Diorama Thu Dec 11, 2014 2:38 pm | |
| Final update for now featuring the base and how it actually looks at this stage. My finall project is to build some of the junk laying around the homestead, weather the Moisture Vaporator and build an illuminated sunset backdrop. Cheers for your words guys, I'll hopefully have more soon |
|
| | |
Commander Clint
TIG Benefactor
Posts : 1996
Join date : 2012-04-10
Age : 54
Location : Cambridge, Ontario, Canada
| | Subject: Re: The Lar's Homestead Diorama Thu Dec 11, 2014 2:47 pm | |
| Thanks for showing the rest of us how "it is supposed to be done". I hope you get the back drop soon, to finish this great project. Now you just need a Luke Farmboy standing in the scene. |
|
| | |
General Kahn
Force Addict
Posts : 3099
Join date : 2011-04-10
Age : 44
Location : England
| | Subject: Re: The Lar's Homestead Diorama Thu Dec 11, 2014 2:58 pm | |
| Cheers Clint I have the farmbot custom ready and waiting, I'm gonna do the backdrop first though |
|
| | |
ArtooDetour
Admin
Posts : 9074
Join date : 2010-03-13
| |
| | |
psybertech
TIG Benefactor
Posts : 2906
Join date : 2013-01-30
Age : 51
Location : TX
| | Subject: Re: The Lar's Homestead Diorama Fri Dec 12, 2014 1:52 pm | |
| Love it man! And so cool to see the process from the start!! Thanks for sharing that! cheers! |
|
| | |
Plisnithus7
Imperial Admiral


Posts : 747
Join date : 2014-09-21
Age : 52
Location : TX
| | Subject: love it Sun Dec 21, 2014 6:28 pm | |
| My boys are very jealous. They are super impressed with your electonics/lighting skills since I am without those. |
|
| | |
Sponsored content
| | Subject: Re: The Lar's Homestead Diorama | |
| |
|
| | |
| | The Lar's Homestead Diorama | |
|